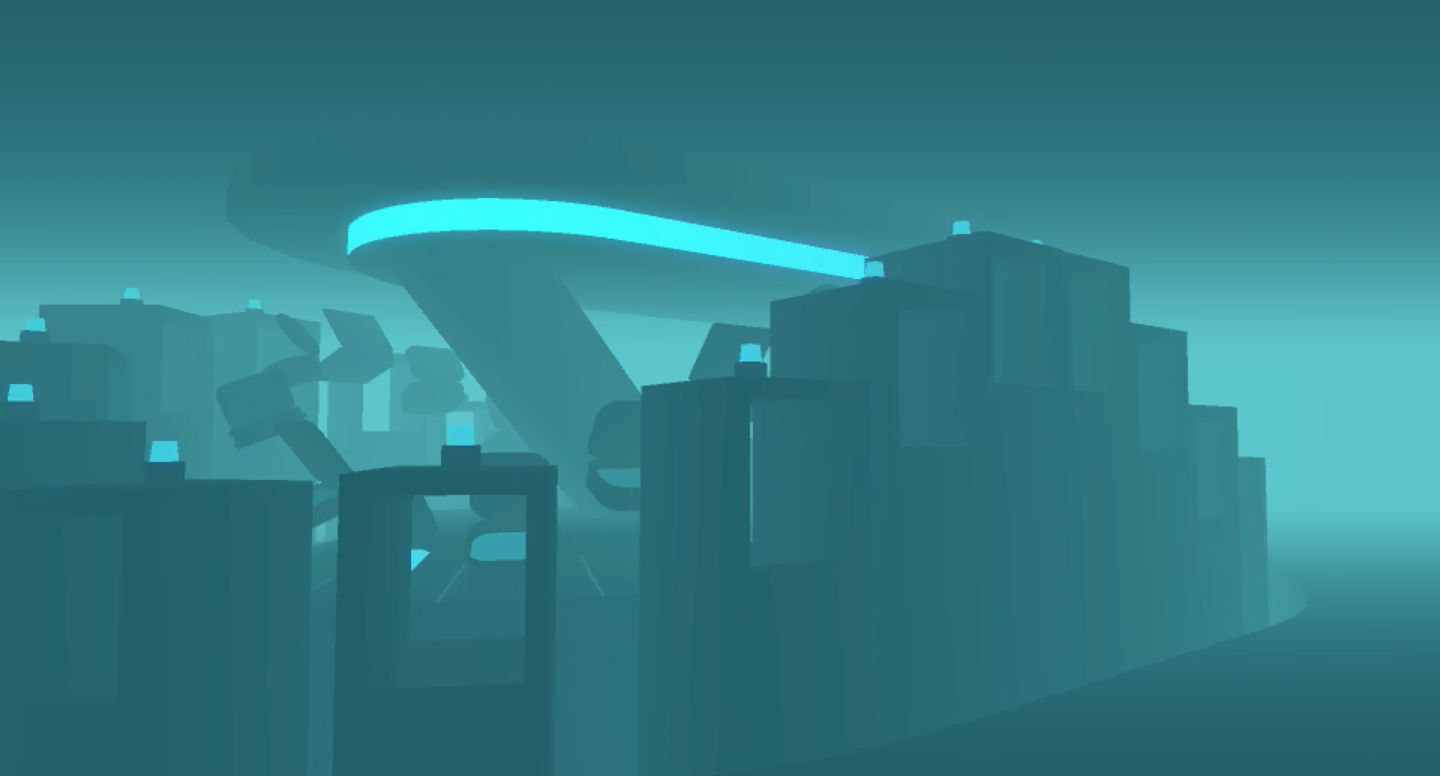
I’m fascinated by how lights set the moods for VR and 3D scenes. One particular style I’ve been into is mix of cyberpunk and minimalist cityscape compositions—which incorporate dark surroundings with glowing neon lights, usually set in the future. A good example is Carl Burton’s work for the game Islands, it’s more on the minimal side of the spectrum.
 Carl Burton’s Islands Game
The constraints of using a dark surrounding, usually with some fog, and then mixed with a single neon color, creates a certain mystery that pulls me in as a viewer.
In this article you’ll recreate a similar type of scene in A-Frame—the open source framework that enables you to create virtual reality scenes that run in the browser. You’ll be able to test it on your desktop browser, on your phone, and with Google Cardboard to see it in VR.
The first pass at this technique is actually quiet simple. you’ll create a blurred png image in either Sketch or Photoshop using the gaussian blur effect—which I’ll show below. Then you’ll attach it to an A-Frame entity. you’ll then import a 3D street light model which I found via Google Blocks by Warren Reid. Finally you’ll add some fog and then see the live scene.
If you don’t know A-Frame don’t worry, I’ll explain it as I go along. It’s a well thought out technology, and perfect for getting into 3D and WebVR. It’s like HTML and CSS for VR.
If you’re tempted to see it before you make it, here is the live example. You can walk around the scene using the w, a, s, and d keys like you would in a first person video game.
Let’s get our hands dirty and make the scene.
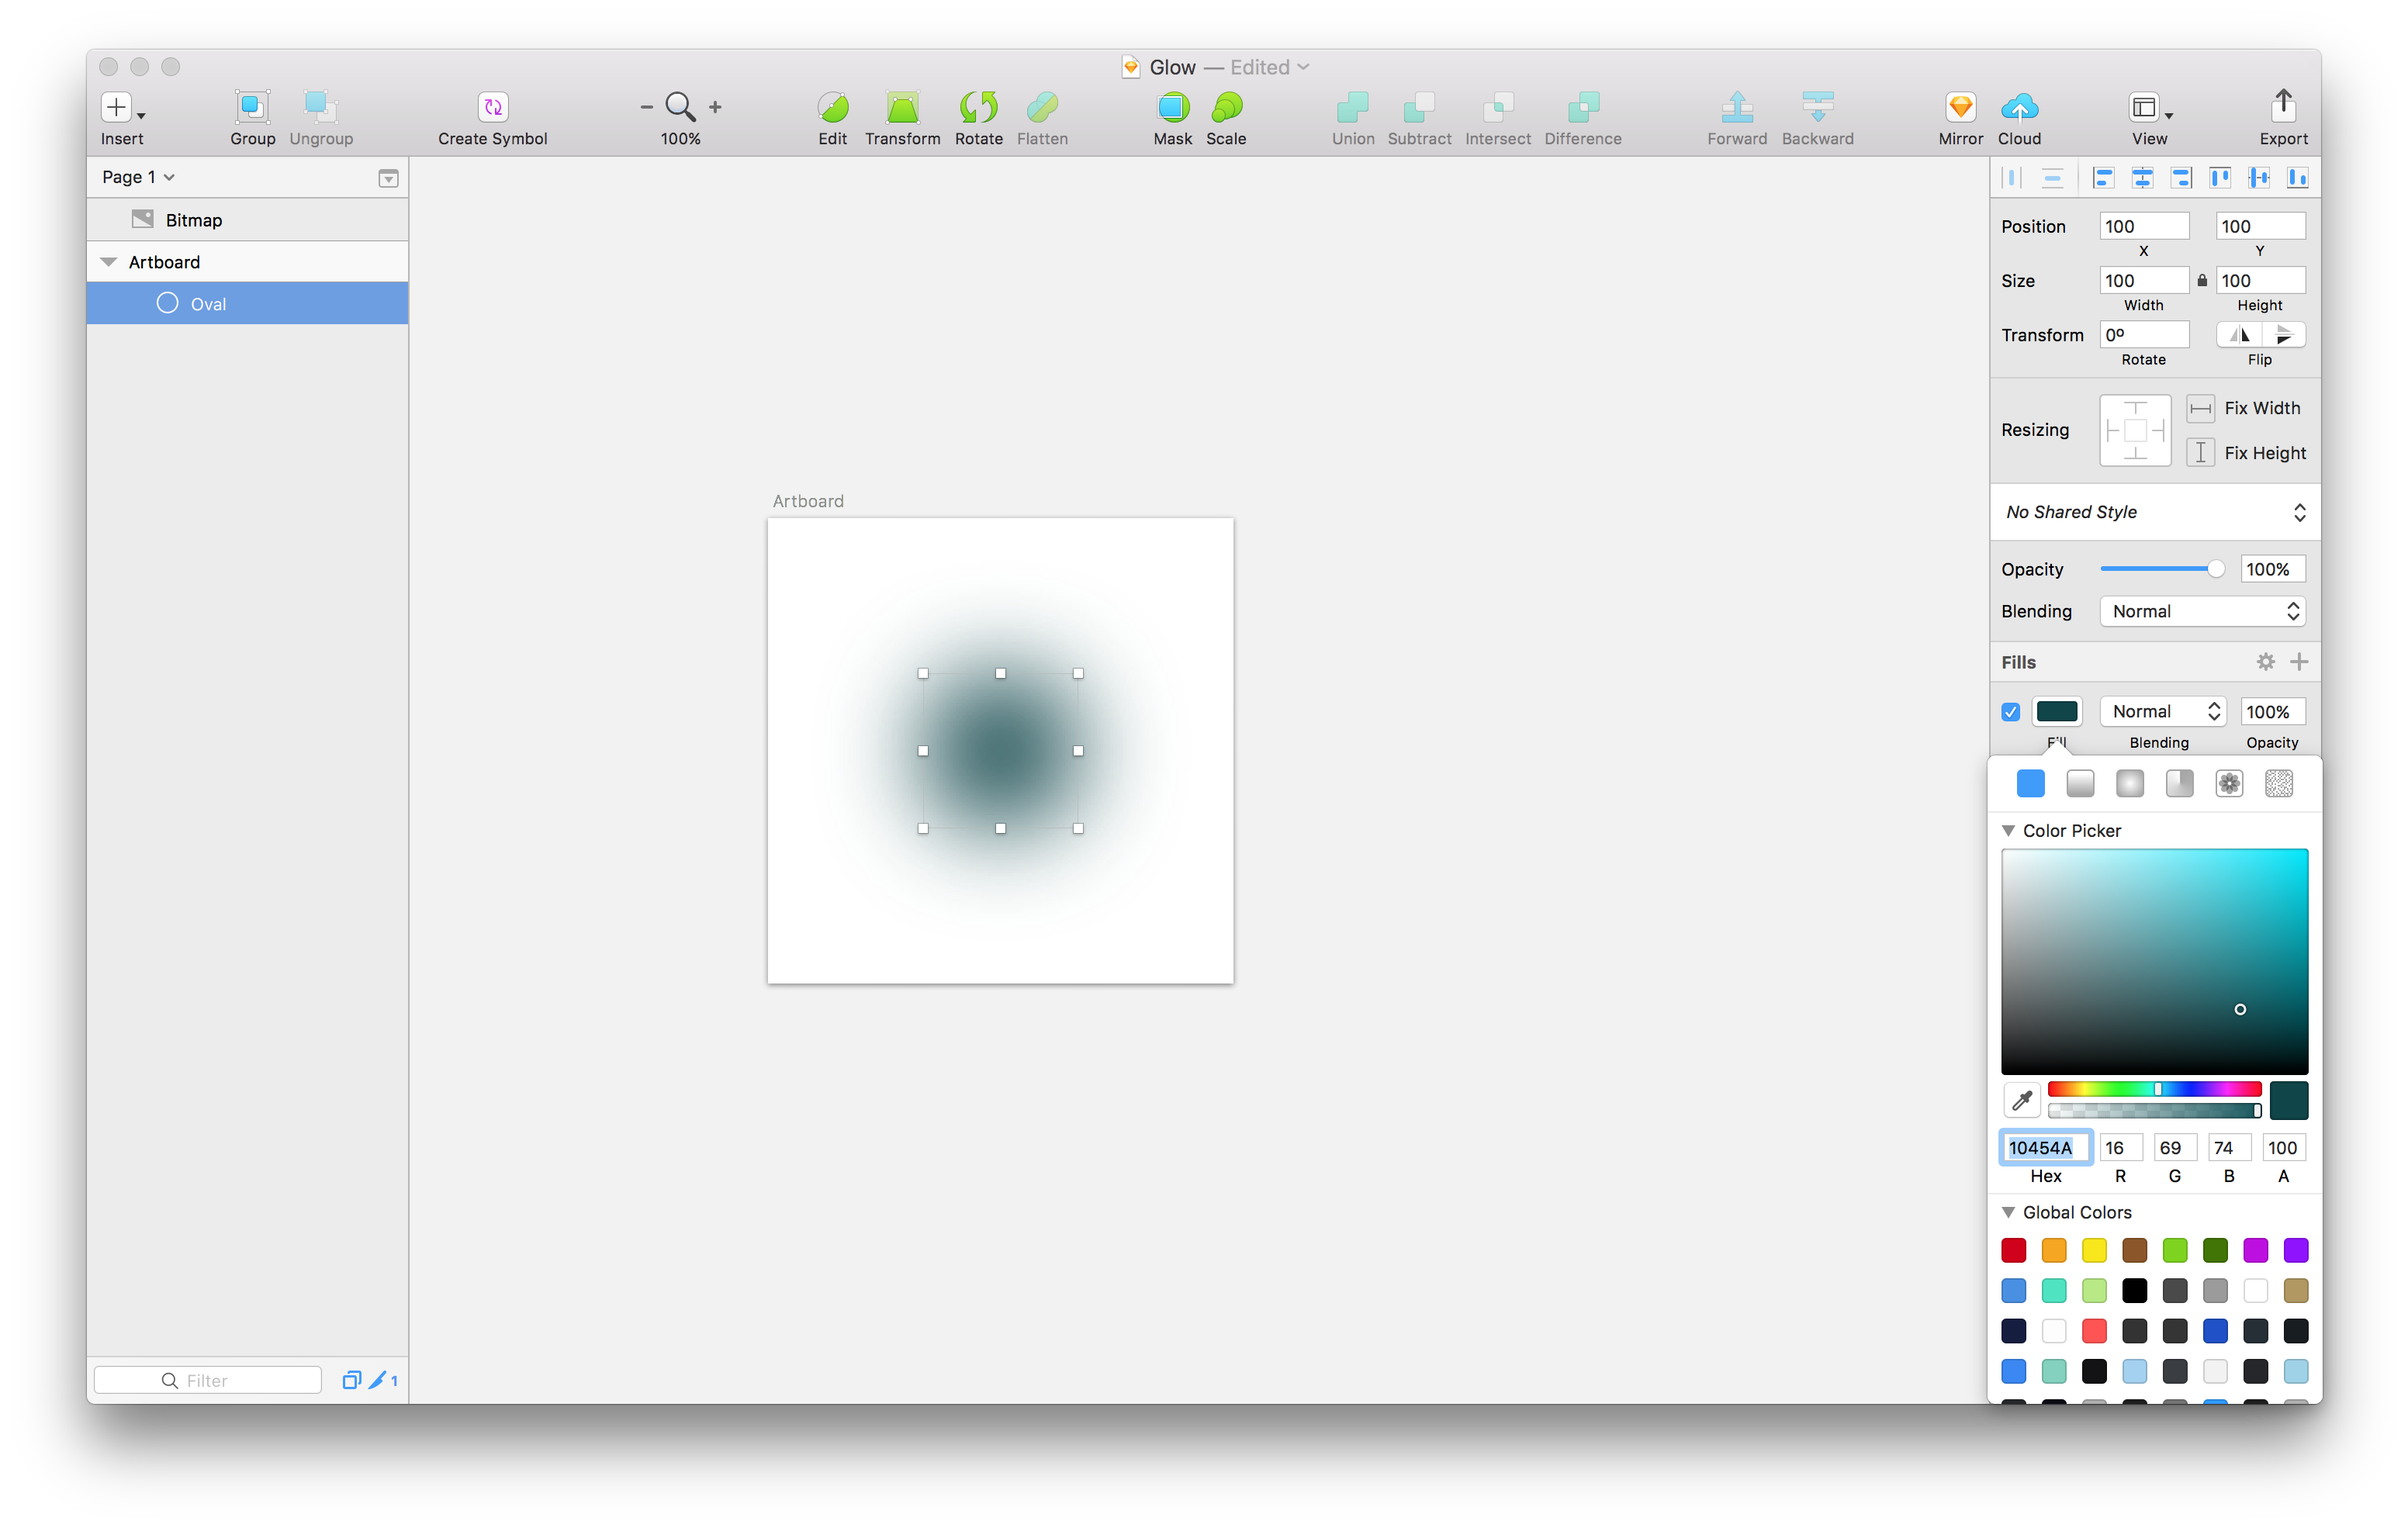
Create the Blurred Image in Sketch
For the first part, I’ll be using Sketch, but feel free to use your tool of choice to create the blurred image.
Launch Sketch and create an artboard at a size of 300 x 300px.
Now create an oval in the middle of the artboard at a size of 100 x 100px. Turn off the border, then choose your desired fill color, I’ll choose the neon blue, inspired by Carl’s work. Then go to the properties panel and set the gaussian blur to 30px.
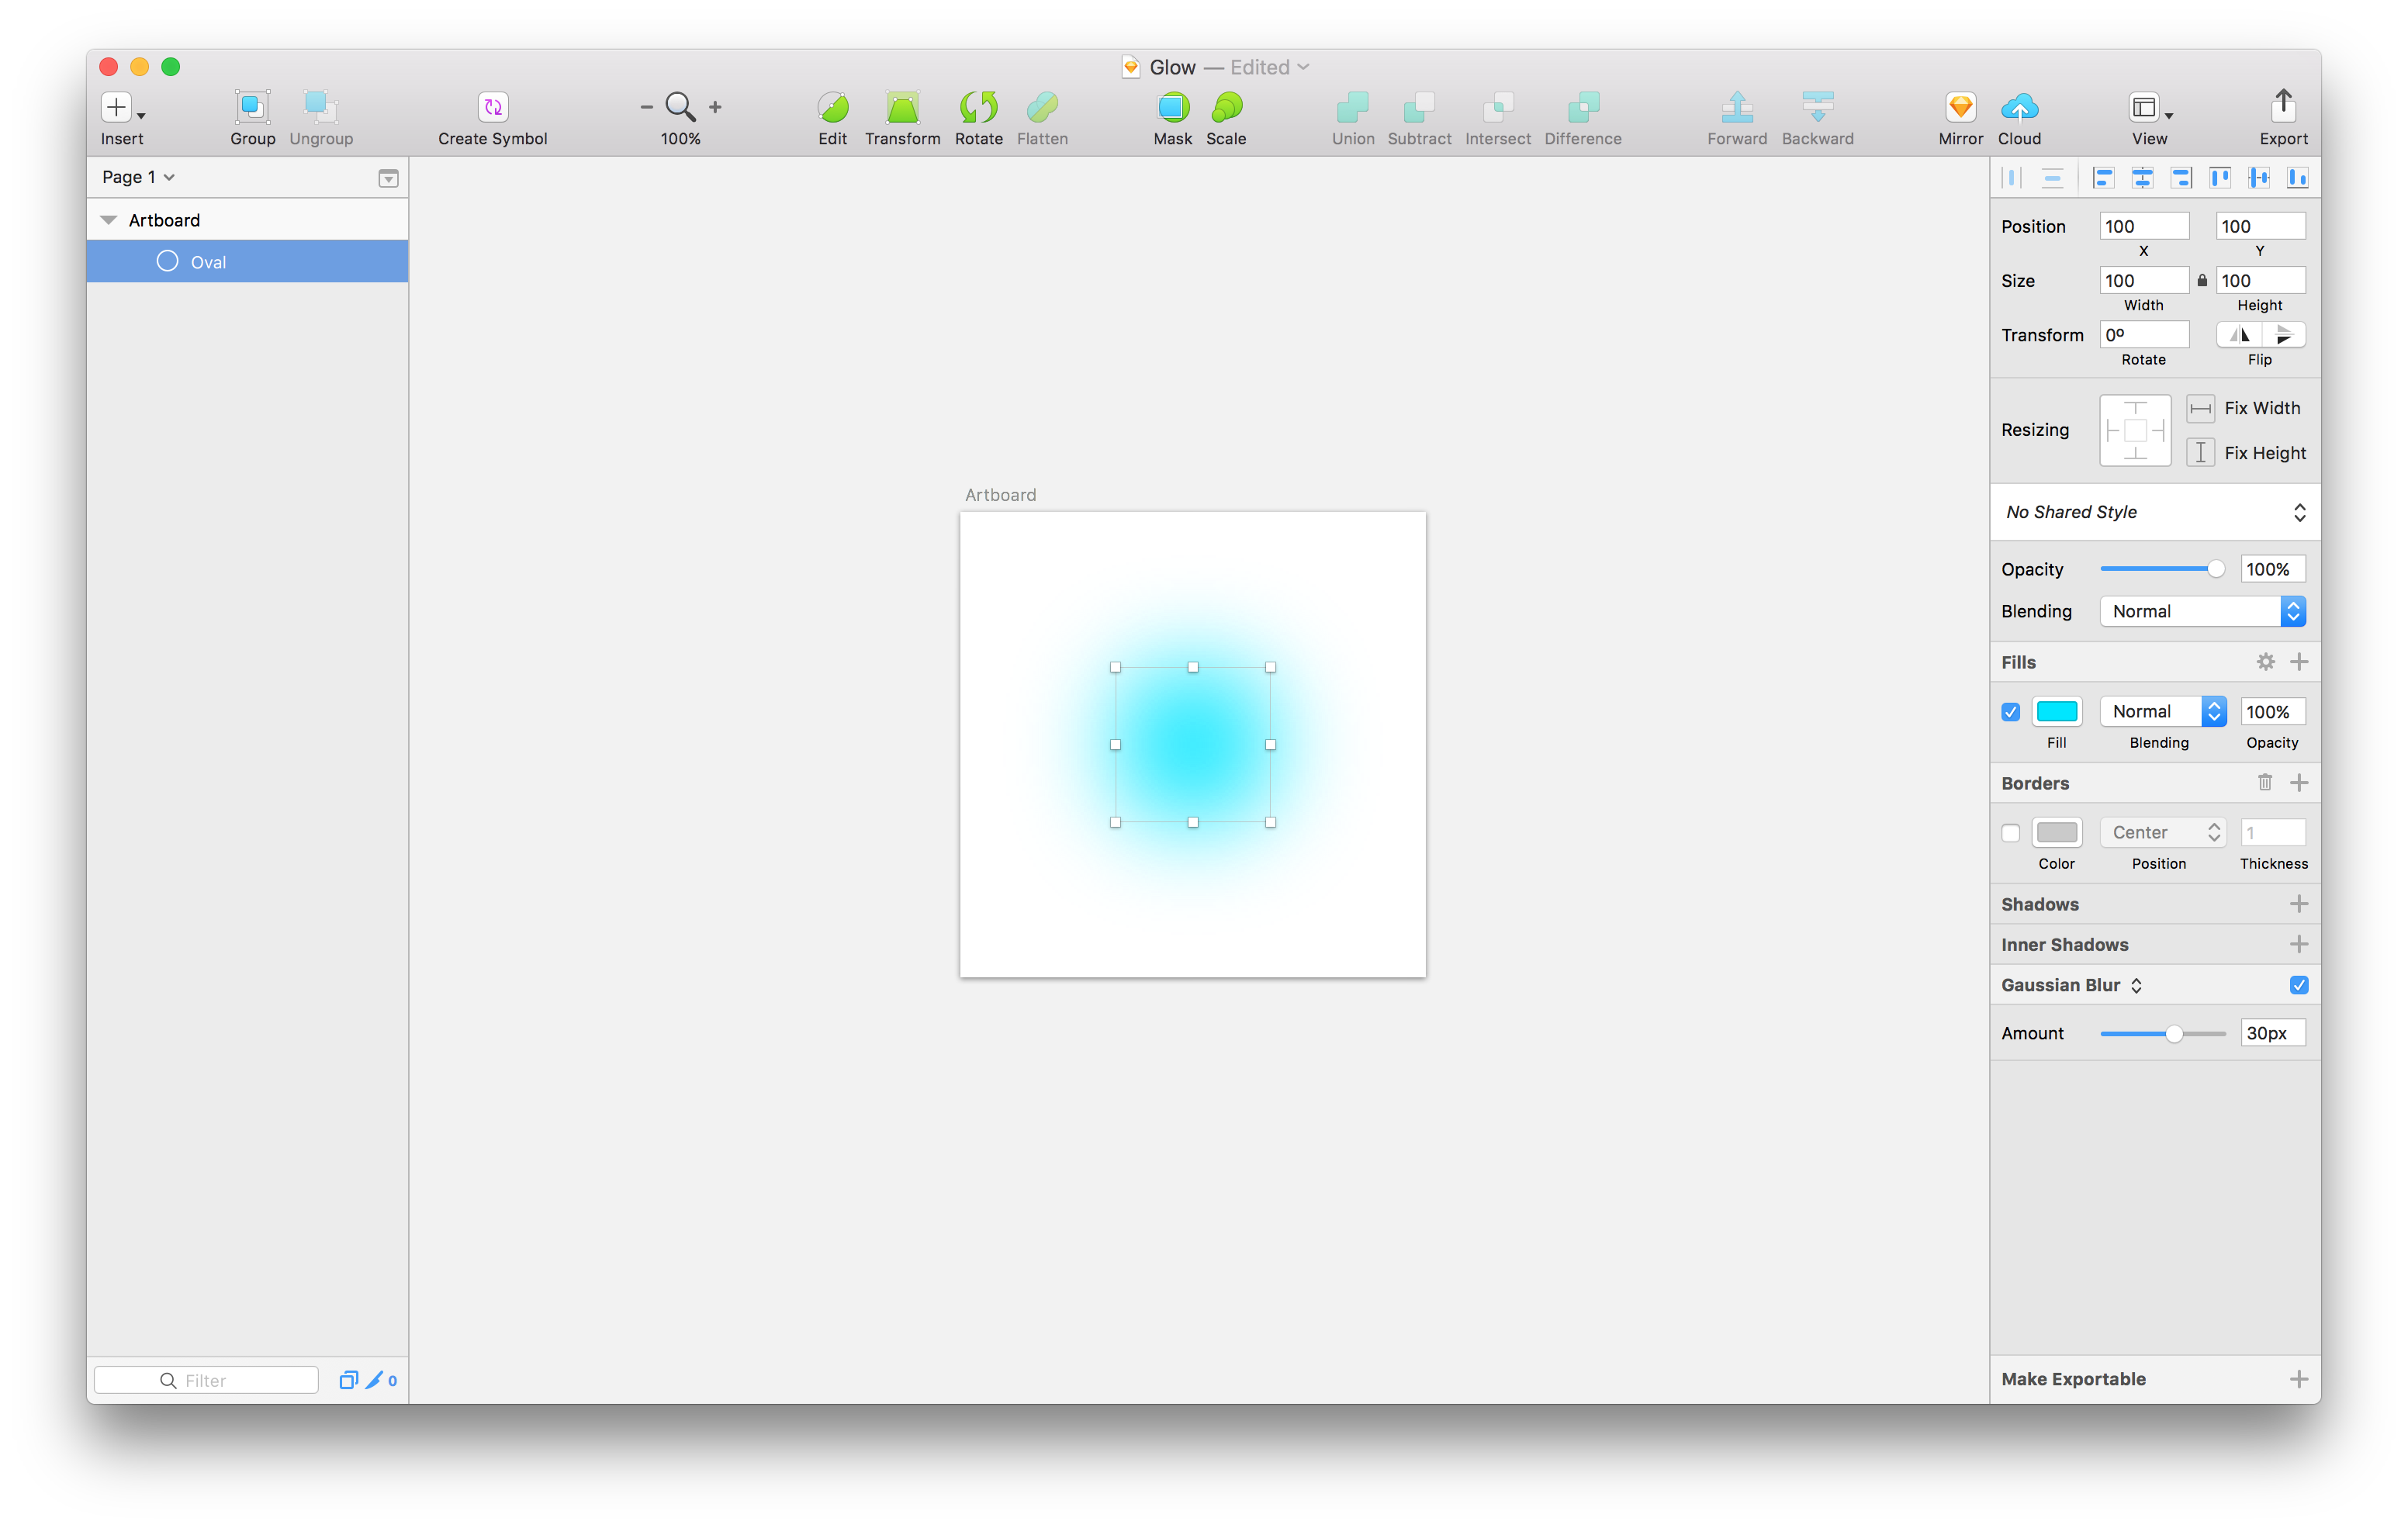
Now you’ll export this file as a transparent png and call it blur.png
Compose the Scene in A-Frame
For the next part we’re going to build the scene with A-Frame markup. It’s very similar to using HTML and CSS.
Let’s create the basic scene. Quick note; instead of making you setup a dev environment on your machine, you’ll use a variant of Kevin’s starter template on Glitch to get started. Click here to see the Glitch A-Frame template and then click the “Remix this” button.
Once you get to the project page, click index.html on the left. This will be your main file to code the scene.
Add the Assets
Let’s start by adding your assets. First you’ll create the markup, then you’ll upload the files, then you’ll paste the uploaded urls into the markup.
A quick intro to assets: A-Frame uses an asset system to load your files before the scene starts. This gives you the benefit of not having to load files as the user is interacting inside the scene. Here’s how the docs state it:
Trying to fetch assets while rendering is slower than fetching all assets before rendering.
Here is how we’re going to load our files:
First create the assets tag inside the <a-scene> tag:
<a-assets></a-assets>
Now you’ll add a tag for each of the files. For images you’ll use the <img> tag, and for 3D models you’ll use the <a-asset-item> tag.
The code should look like this:
<a-assets>
  <img id="blur-image" src="">
  <a-asset-item id="street-lamp-obj" src=""></a-asset-item>
  <a-asset-item id="street-lamp-mtl" src=""></a-asset-item>
</a-assets>
Notice that each asset has an id attribute. You’ll use that shortly to connect it to objects in the scene. Also notice that the img tag doesn’t have a corresponding closing tag like a-asset-item, that’s because it’s actually just a plain old HTML 5 img tag, which doesn’t need a closing tag.
Next you need to upload the assets and grab their urls.
Let’s start by adding your 3D model from Google Blocks. First download it from here. Then unzip the file onto your machine. Now back in Glitch, click the assets folder on the left of your screen.
Now drag the two files (model.obj and model.mtl) from the unzipped folder onto the page.
Then also drag the blur.png image as well.
An .obj file is our actual 3D model, the file describes the model’s geometry, and the .mtl file describes its material, how it appears, like the colors and textures. It’s a fairly common file format for 3D models like jpg and png are for images.
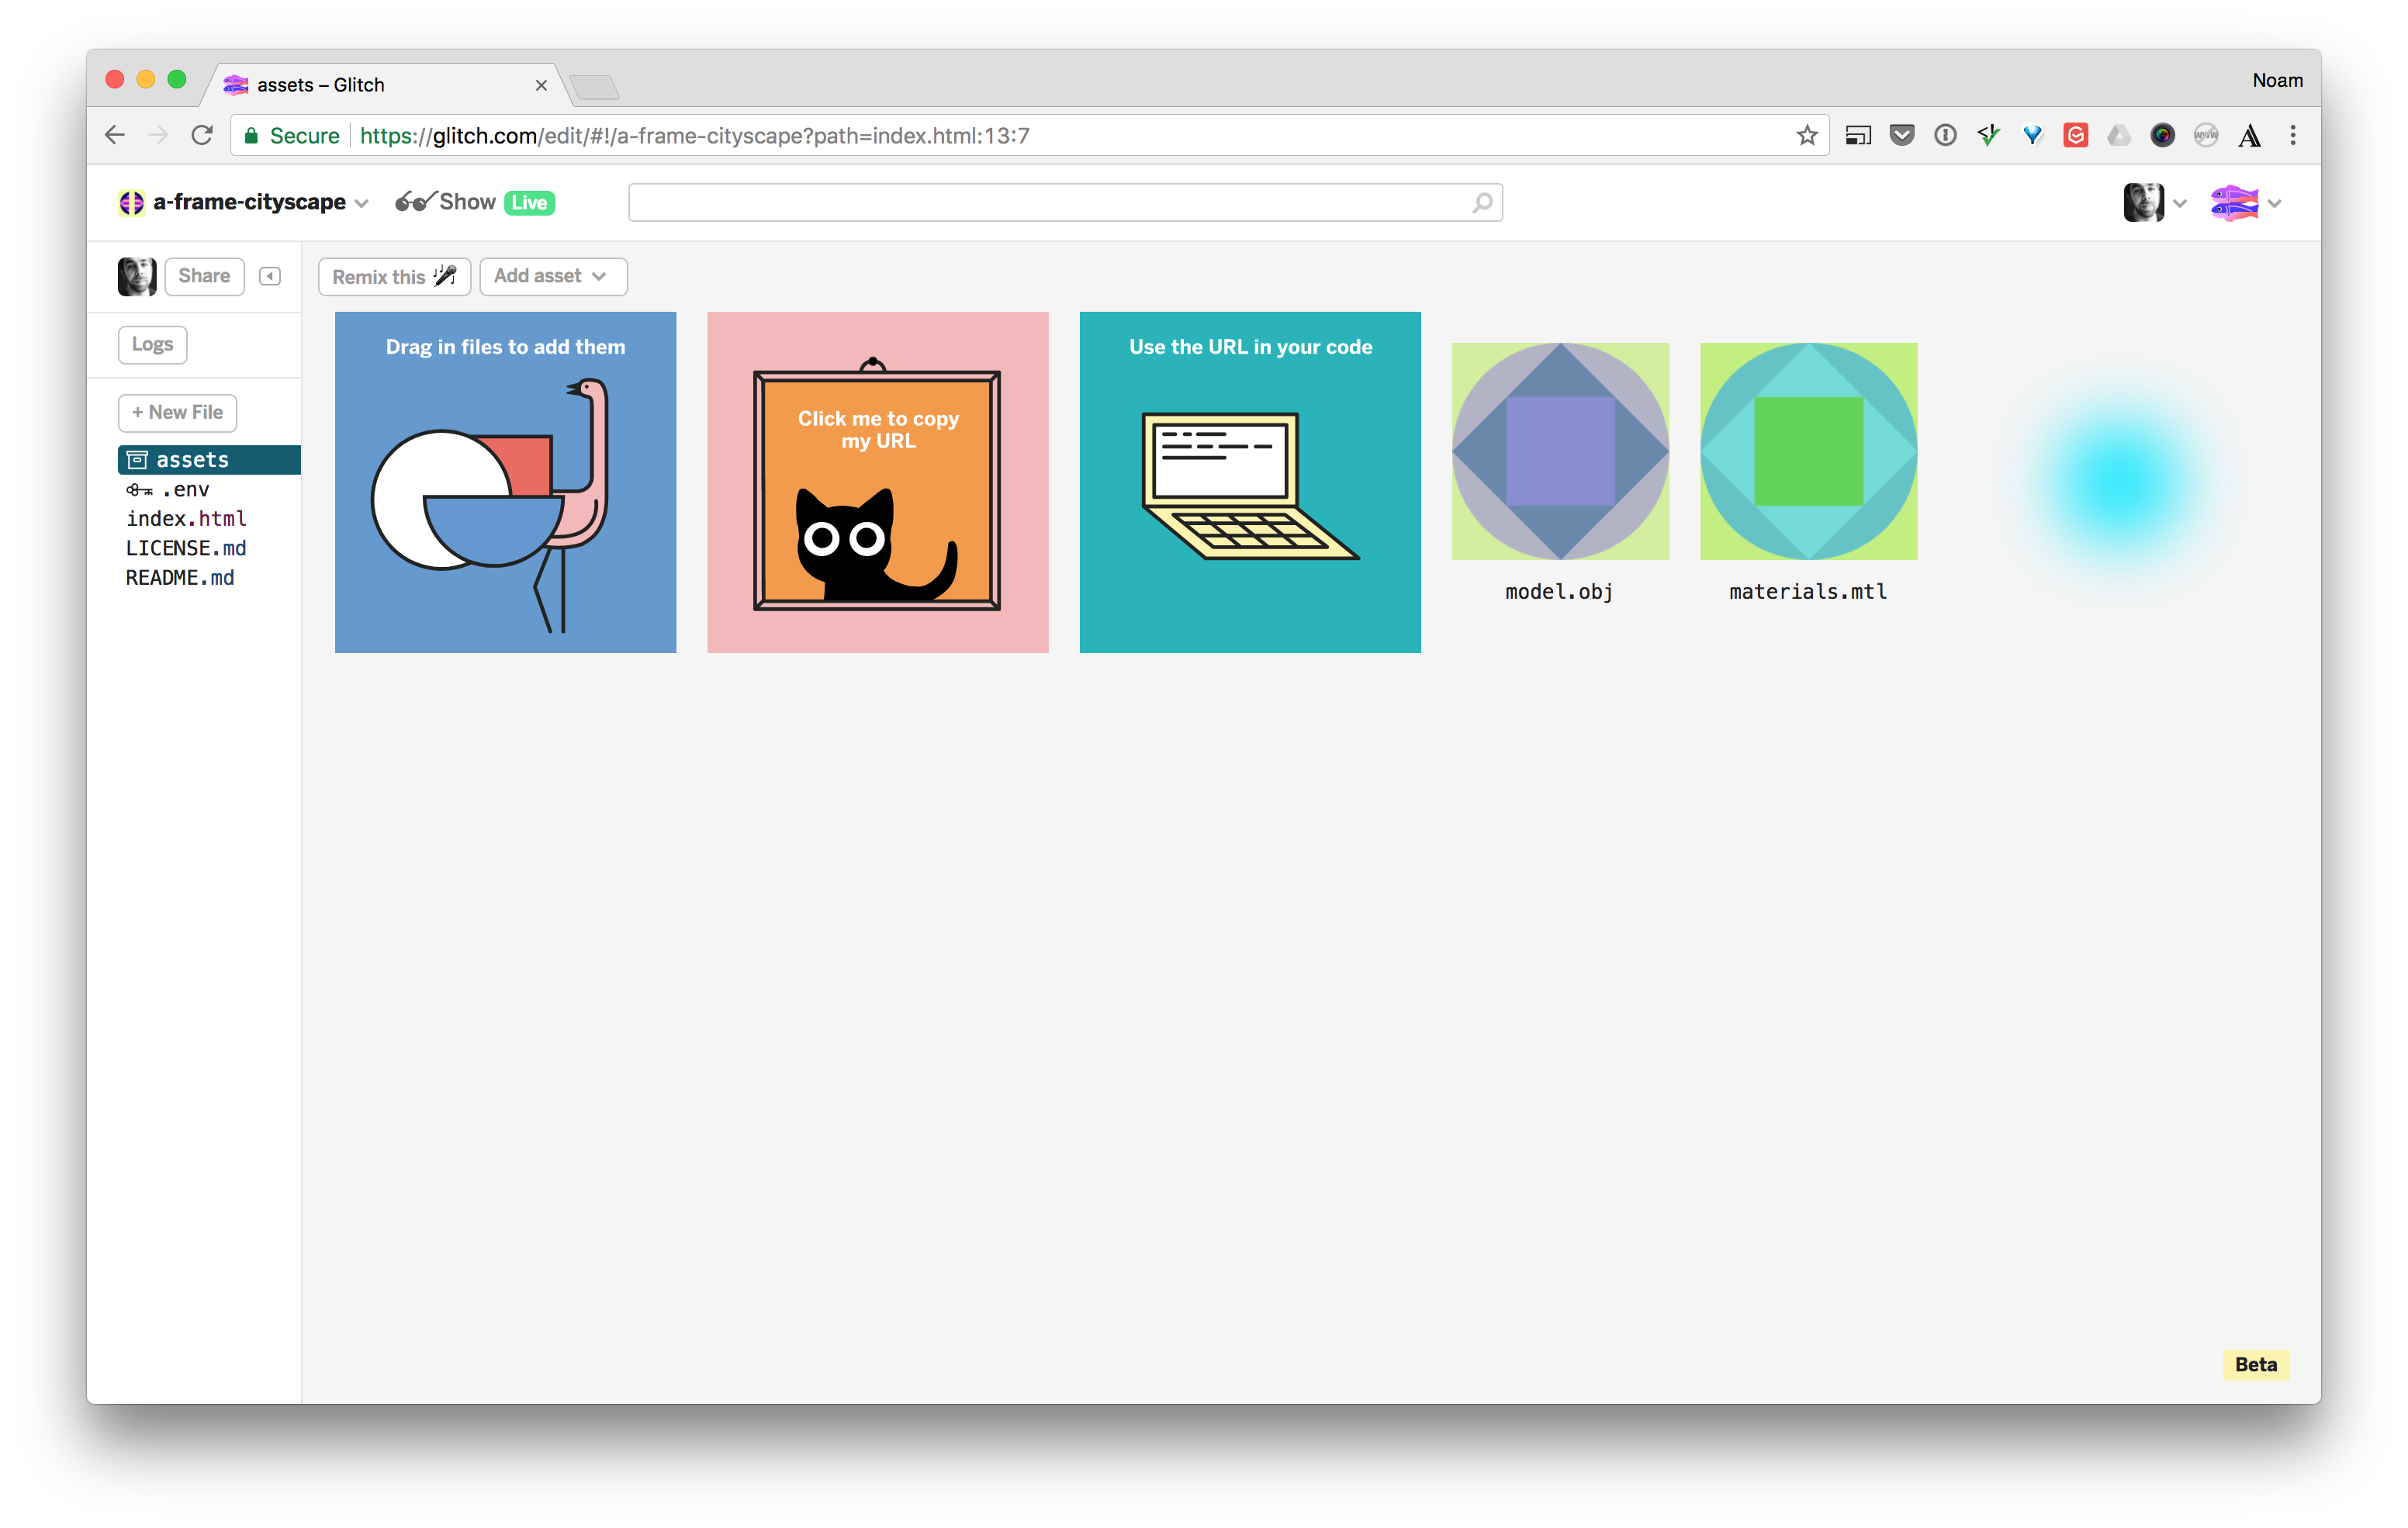
Here is what your assets screen should look like:
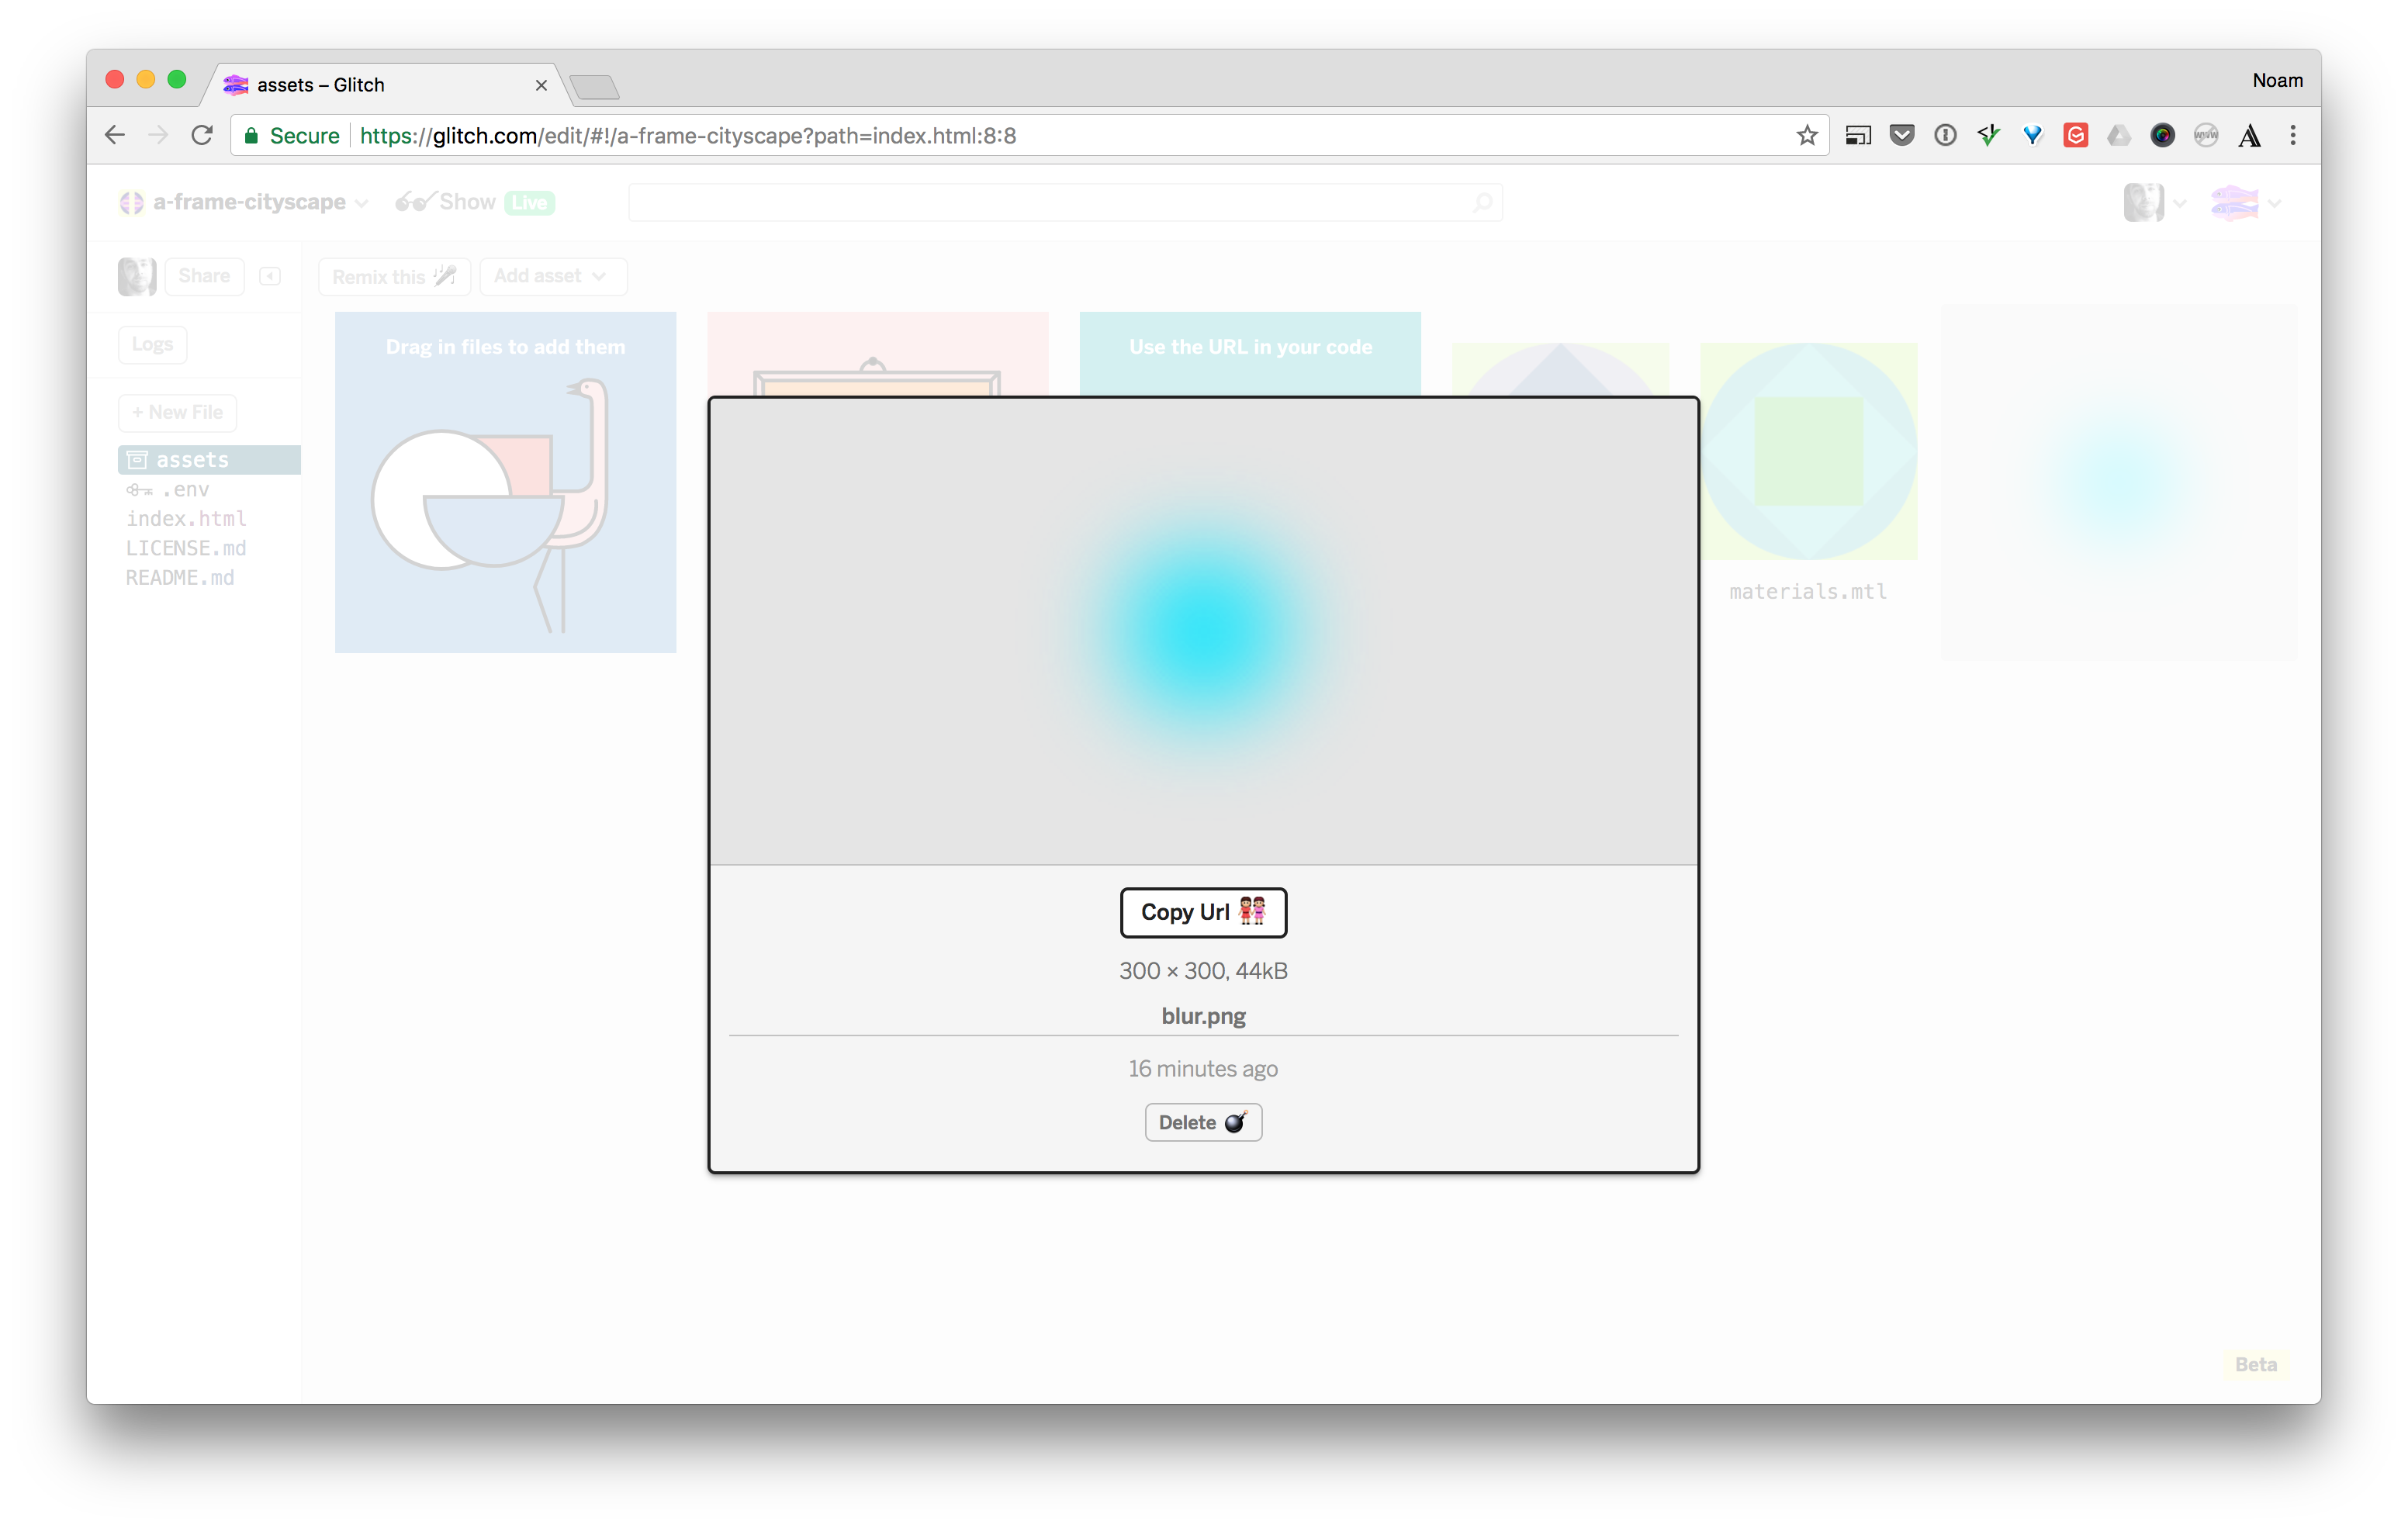
Next you’re going to grab the urls. Click the blur image and a little pop-up should appear. Click the copy Url button.
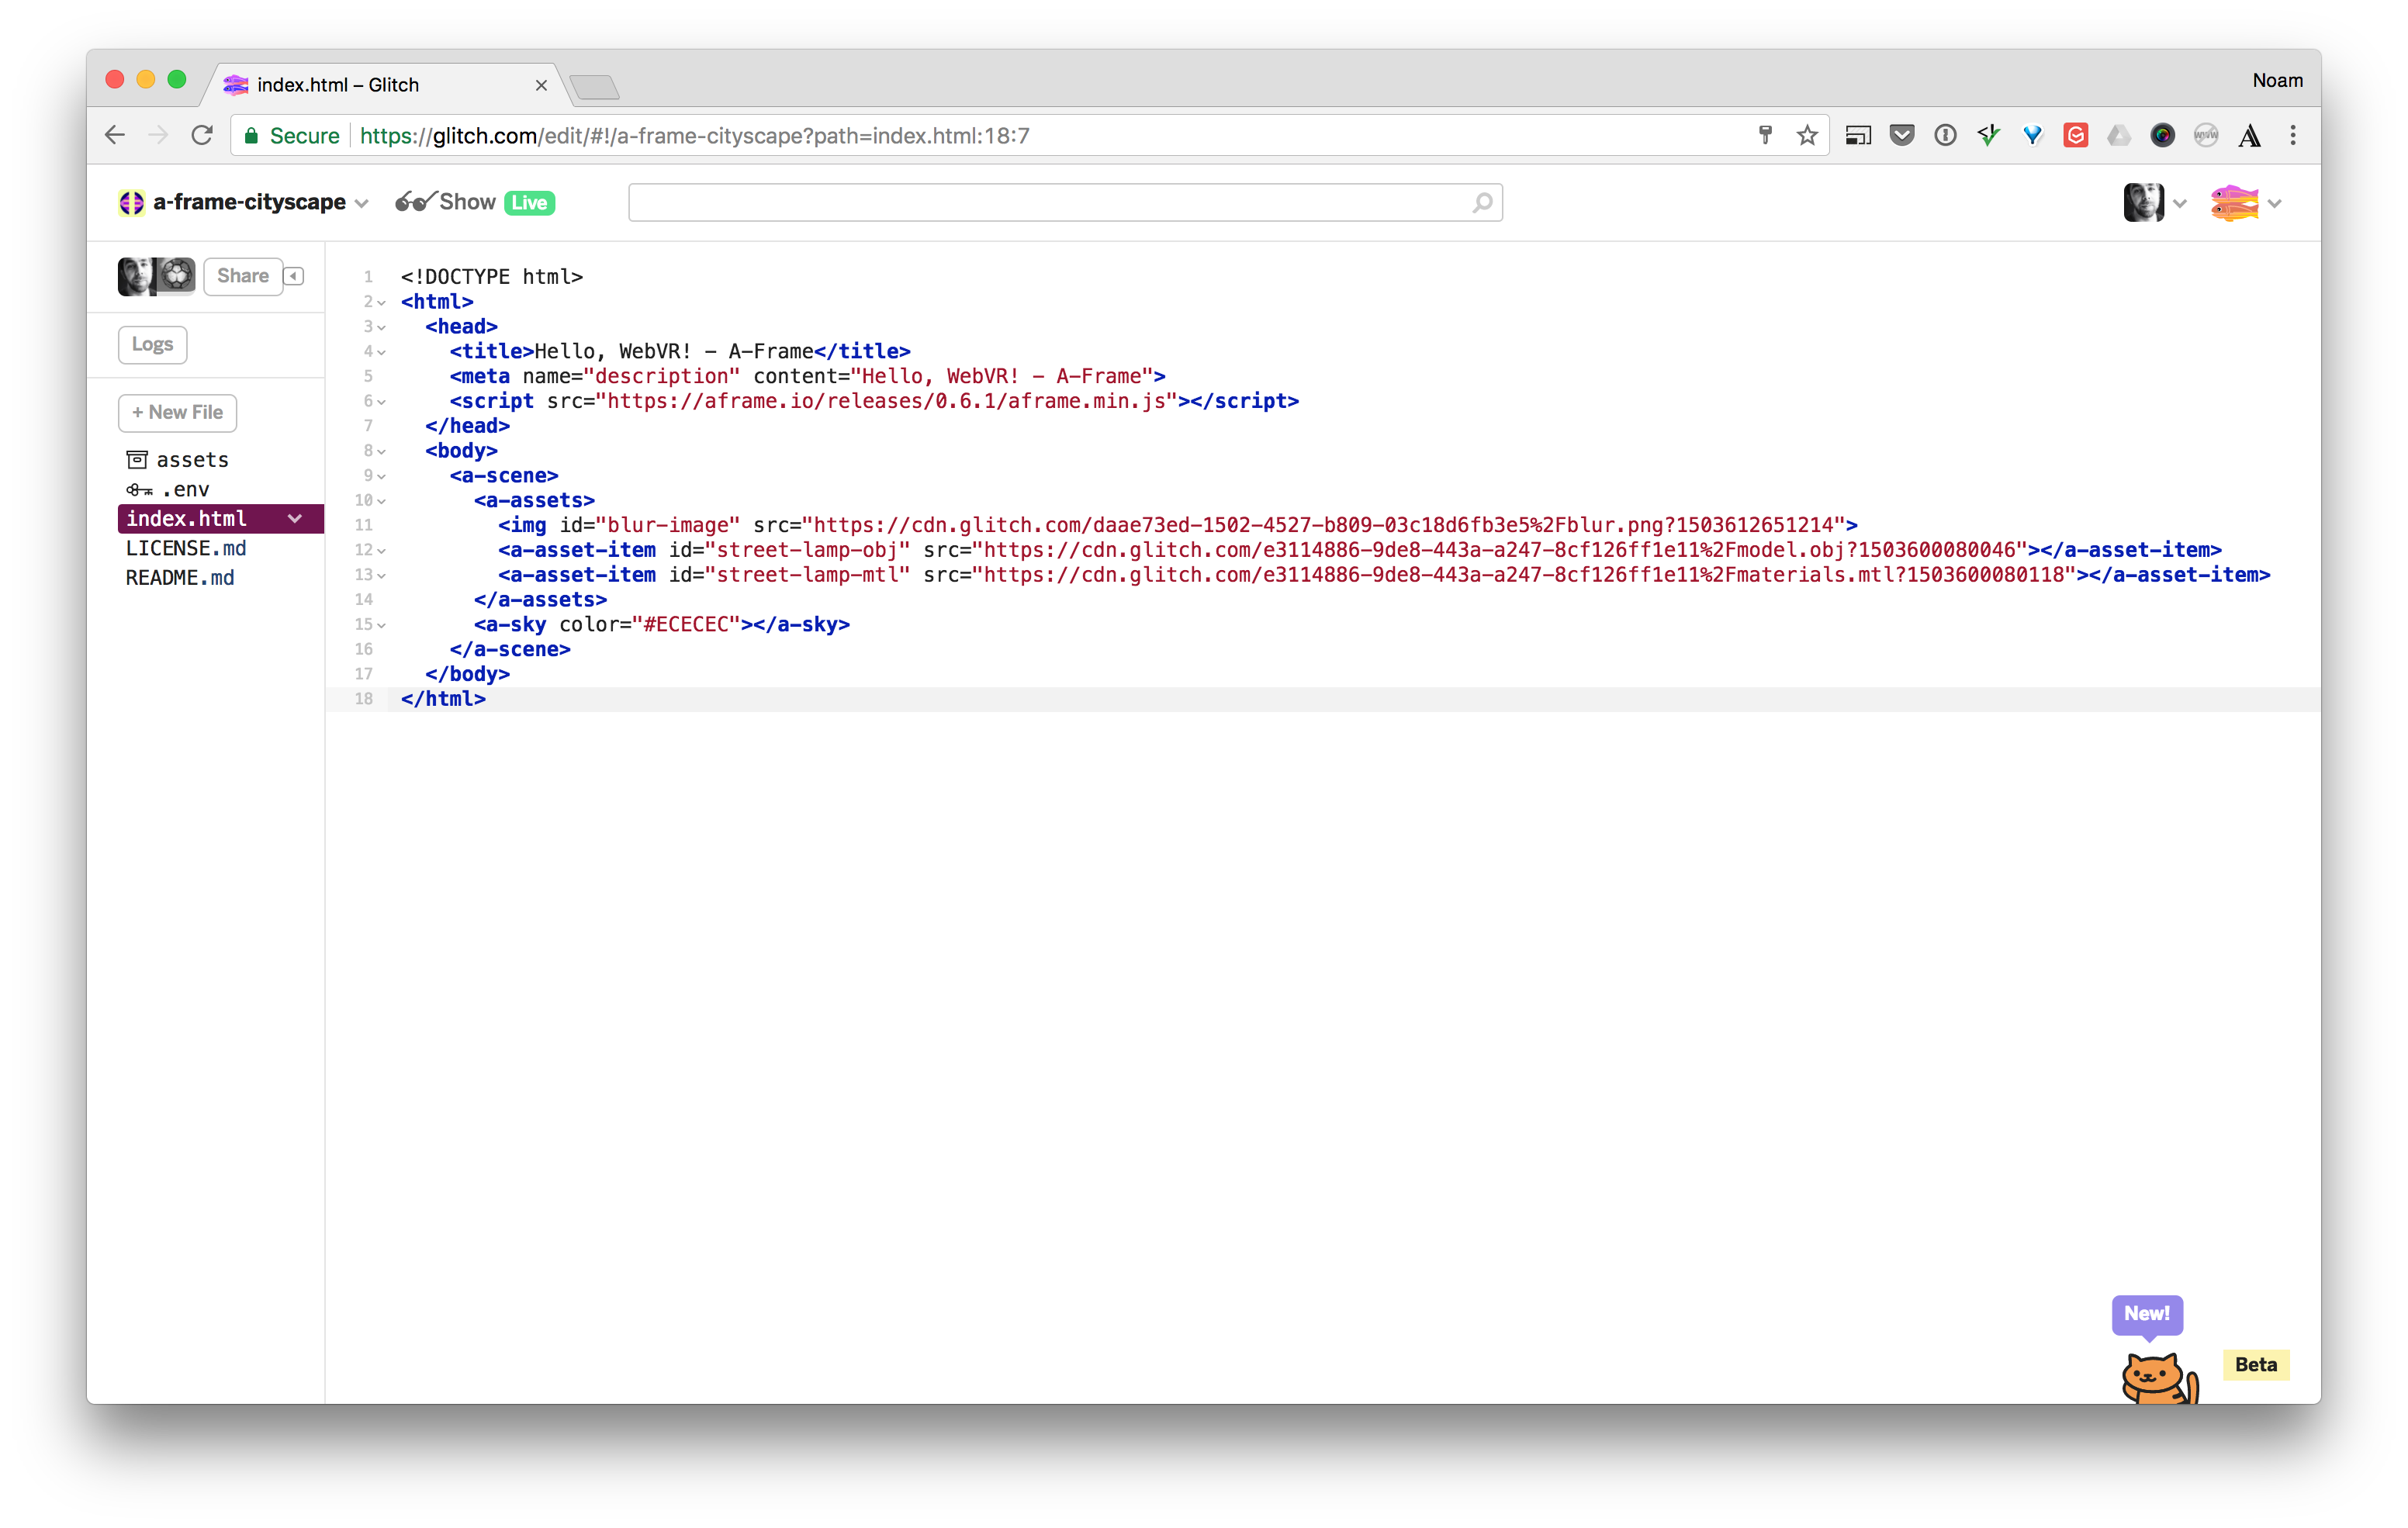
Now go back to index.html and paste that url into the src attribute of the img tag. Your code should look something like this:
<img id="blur-image" src="https://cdn.glitch.com/daae73ed-1502-4527-b809-03c18d6fb3e5%2Fblur.png?1503612651214">
Now you need to repeat the process for the .obj and .mtl files.
Click the assets folder on the left again. Click the .obj file, and click the Copy Url button. Now go back to the index page and paste that url into the asset item for the obj file.
Repeat one more time for the mtl file.
You code should now look like this:
Place the 3D Objects in the A-Frame Scene
Now that you have all of your assets ready, let’s actually place them inside the scene!
First let’s create a ground element. You’ll use a plane primitive entity and rotate it -90 degrees so that it’s flat. To do so you’ll add an <a-plane> tag after our <a-sky> tag.
<a-plane position="0 0 0" rotation="-90 0 0" width="100" height="100" color="#333333"></a-plane>
FYI: A primitive is a more semantic way of creating an entity with certain geometry and components. You can think of it as a convenient building block.
Note also that the width and height and most other numerical values in A-Frame are set in meters, not pixels. 1 meter is about 3.2 feet.
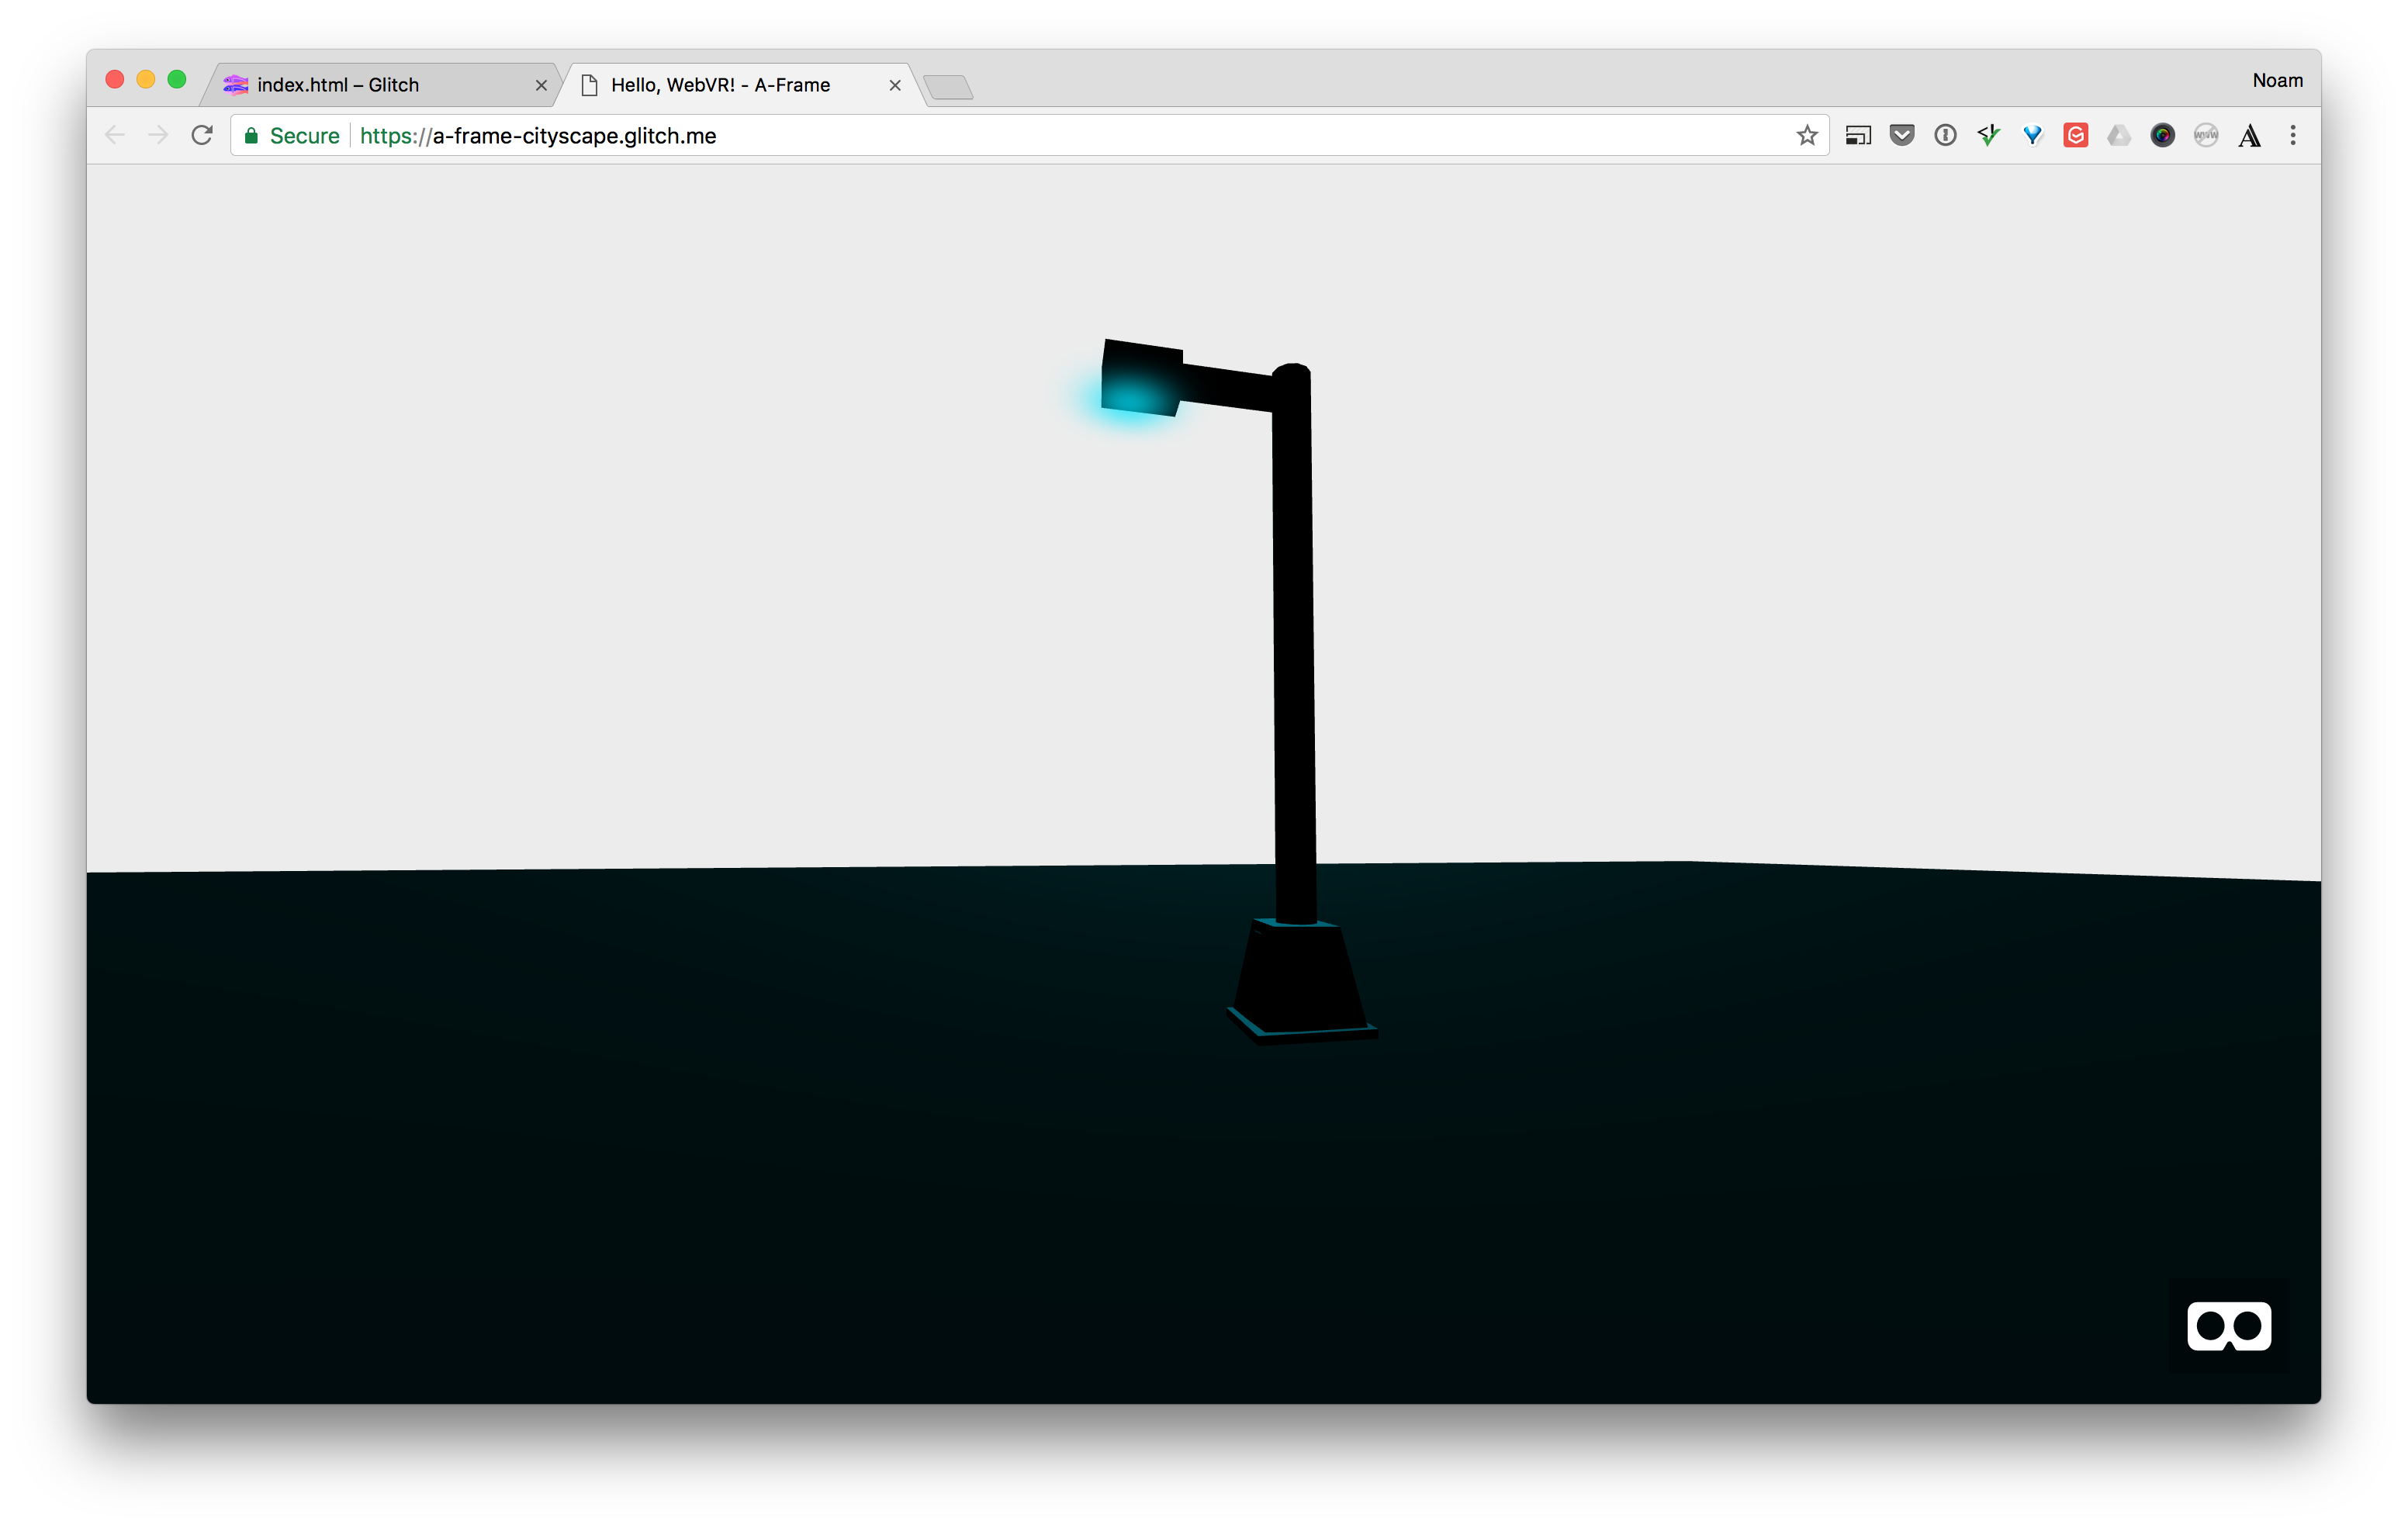
Click the Show Live button at the top left area of your screen to see what you have so far. You should see an empty scene, with a dark ground.
![]()
Now lets add your light model.
You’ll use another primitive
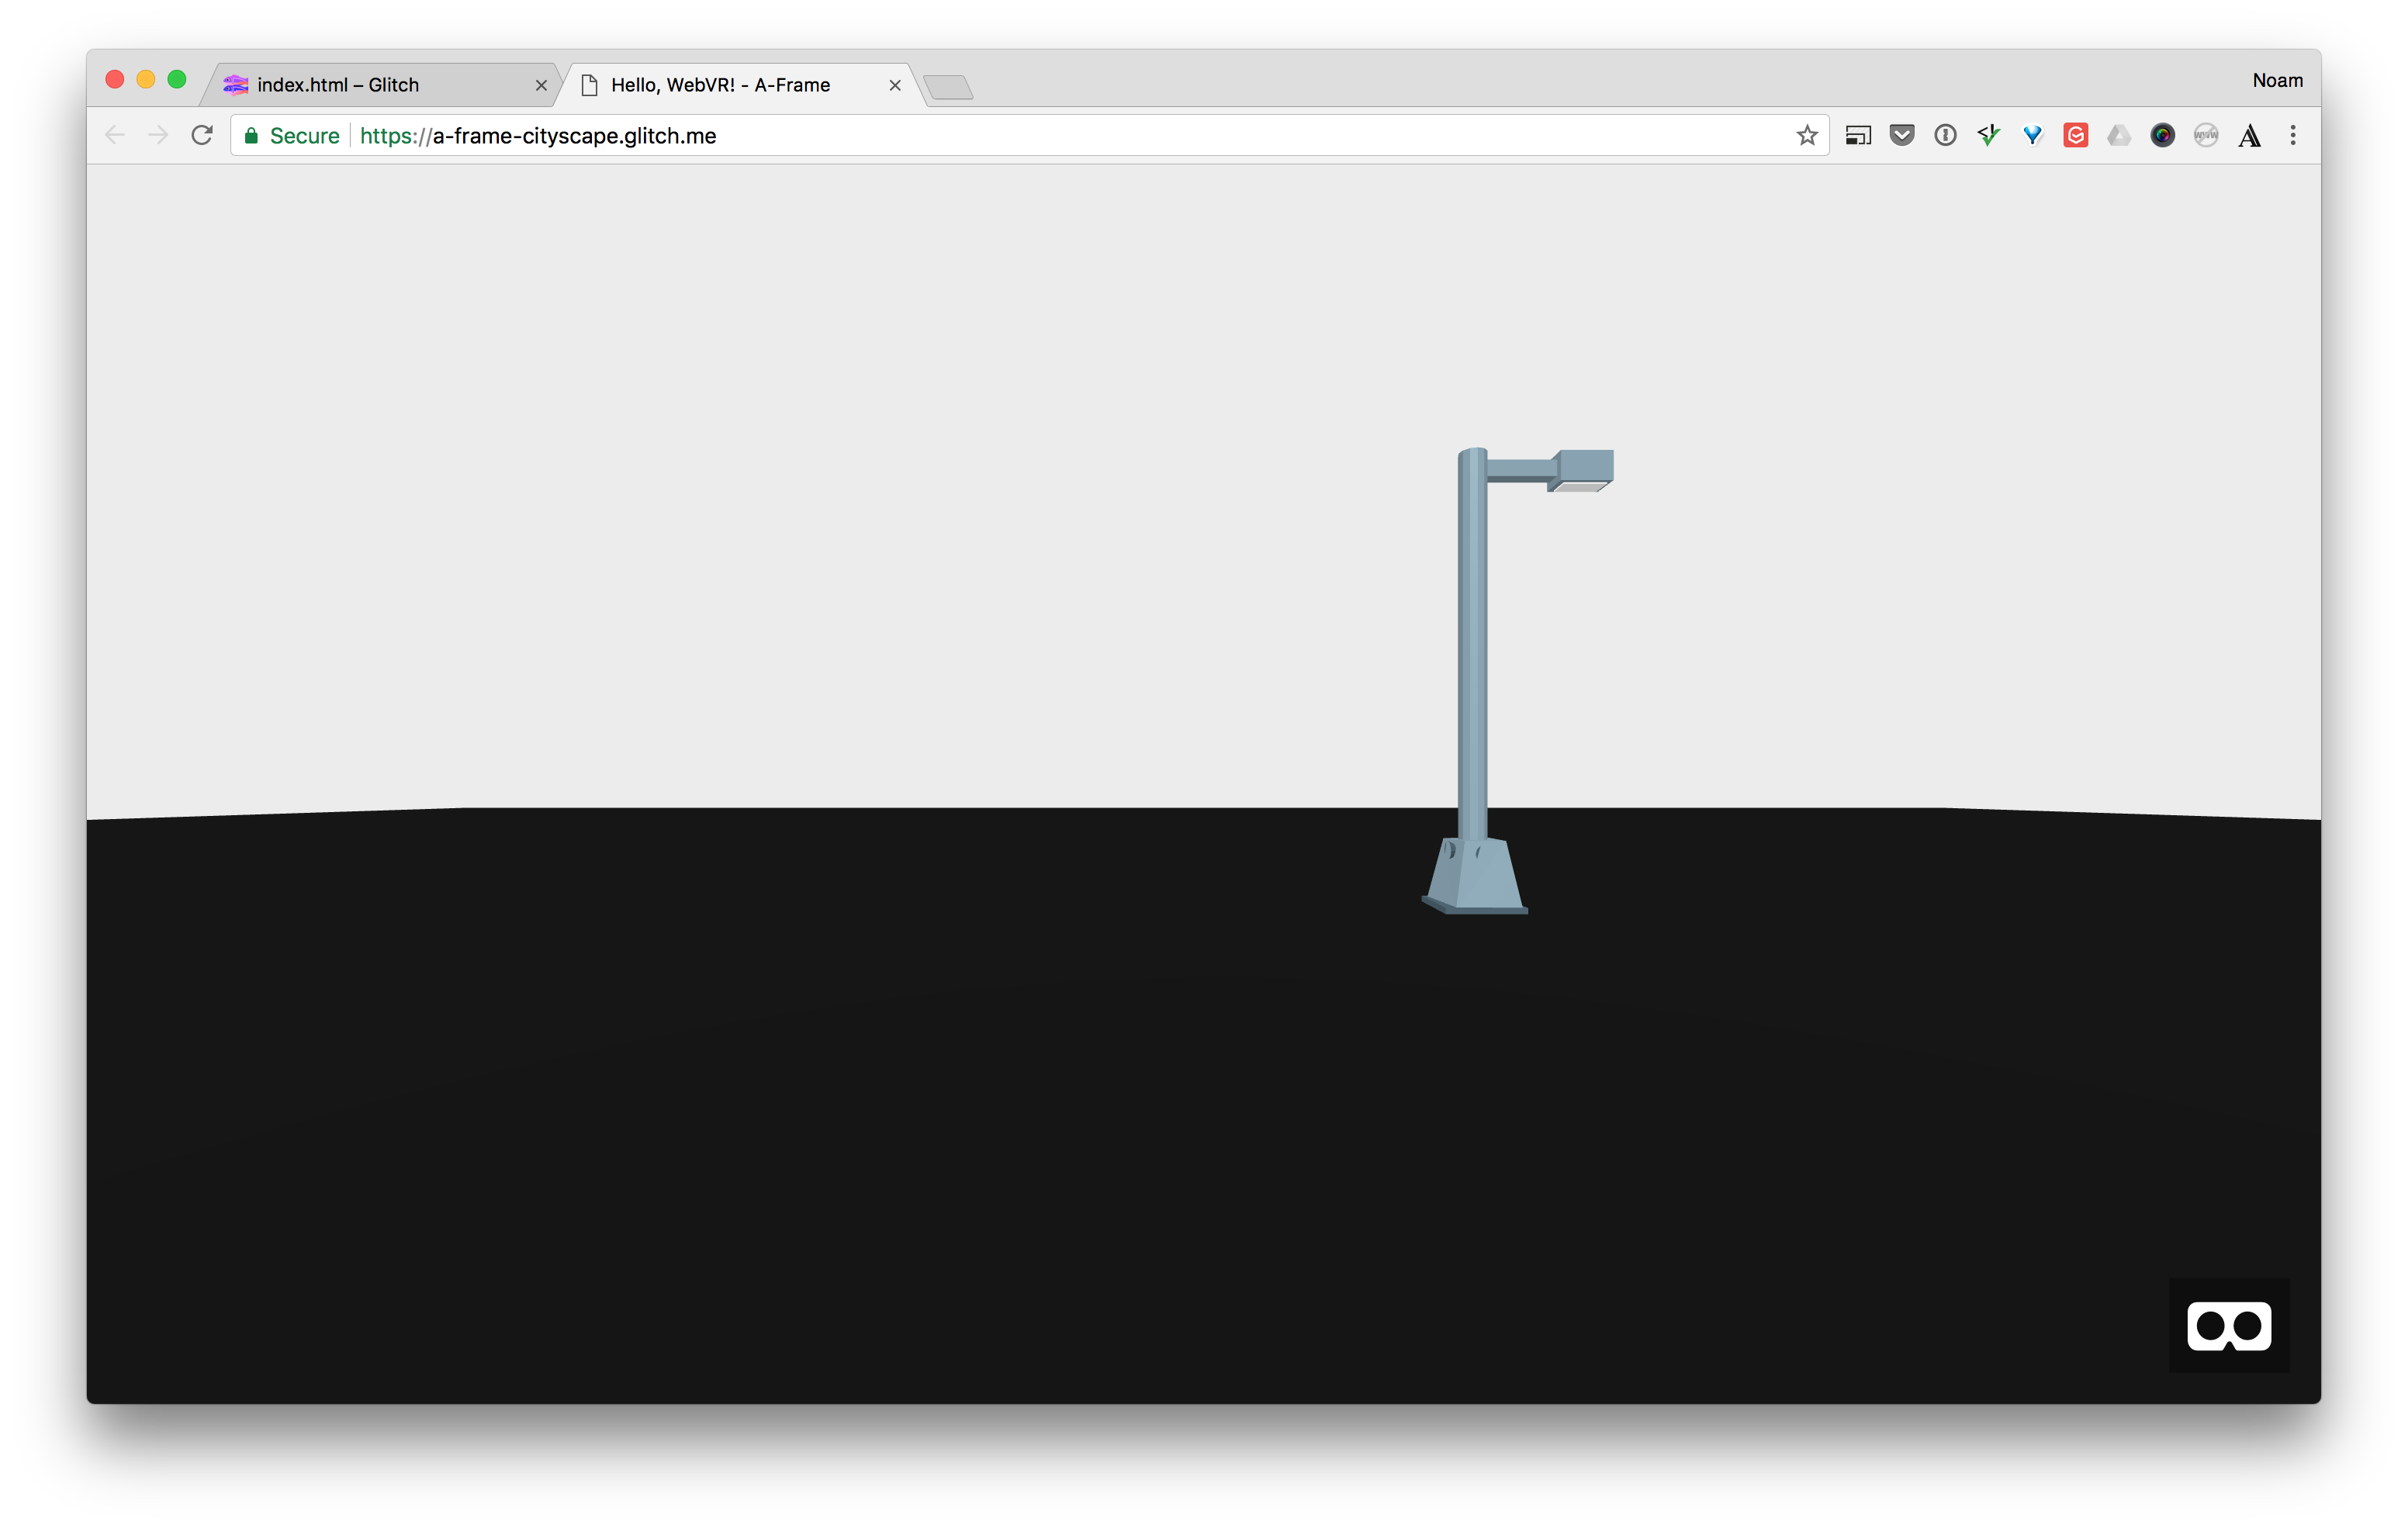
<a-obj-model src="#street-lamp-obj" mtl="#street-lamp-mtl"></a-obj-model>
If you click the Show Live button now, you might be surprised to not see the 3D model. It’s actually there, click the S key on your keyboard (which will make you move backwards), and then you’ll see model.
Let’s tweak some attributes to position it in a more meaningful place.
First you’ll add the position attribute.
<a-obj-model position="2 2 -5" src="#street-lamp-obj" mtl="#street-lamp-mtl"></a-obj-model>
Notice that the position attribute has three values, x (left and right), y (up and down), and z (forward and backwards). A lower z value like -5, means it’s moving away from you.
Go ahead and click Show Live, and see the difference.
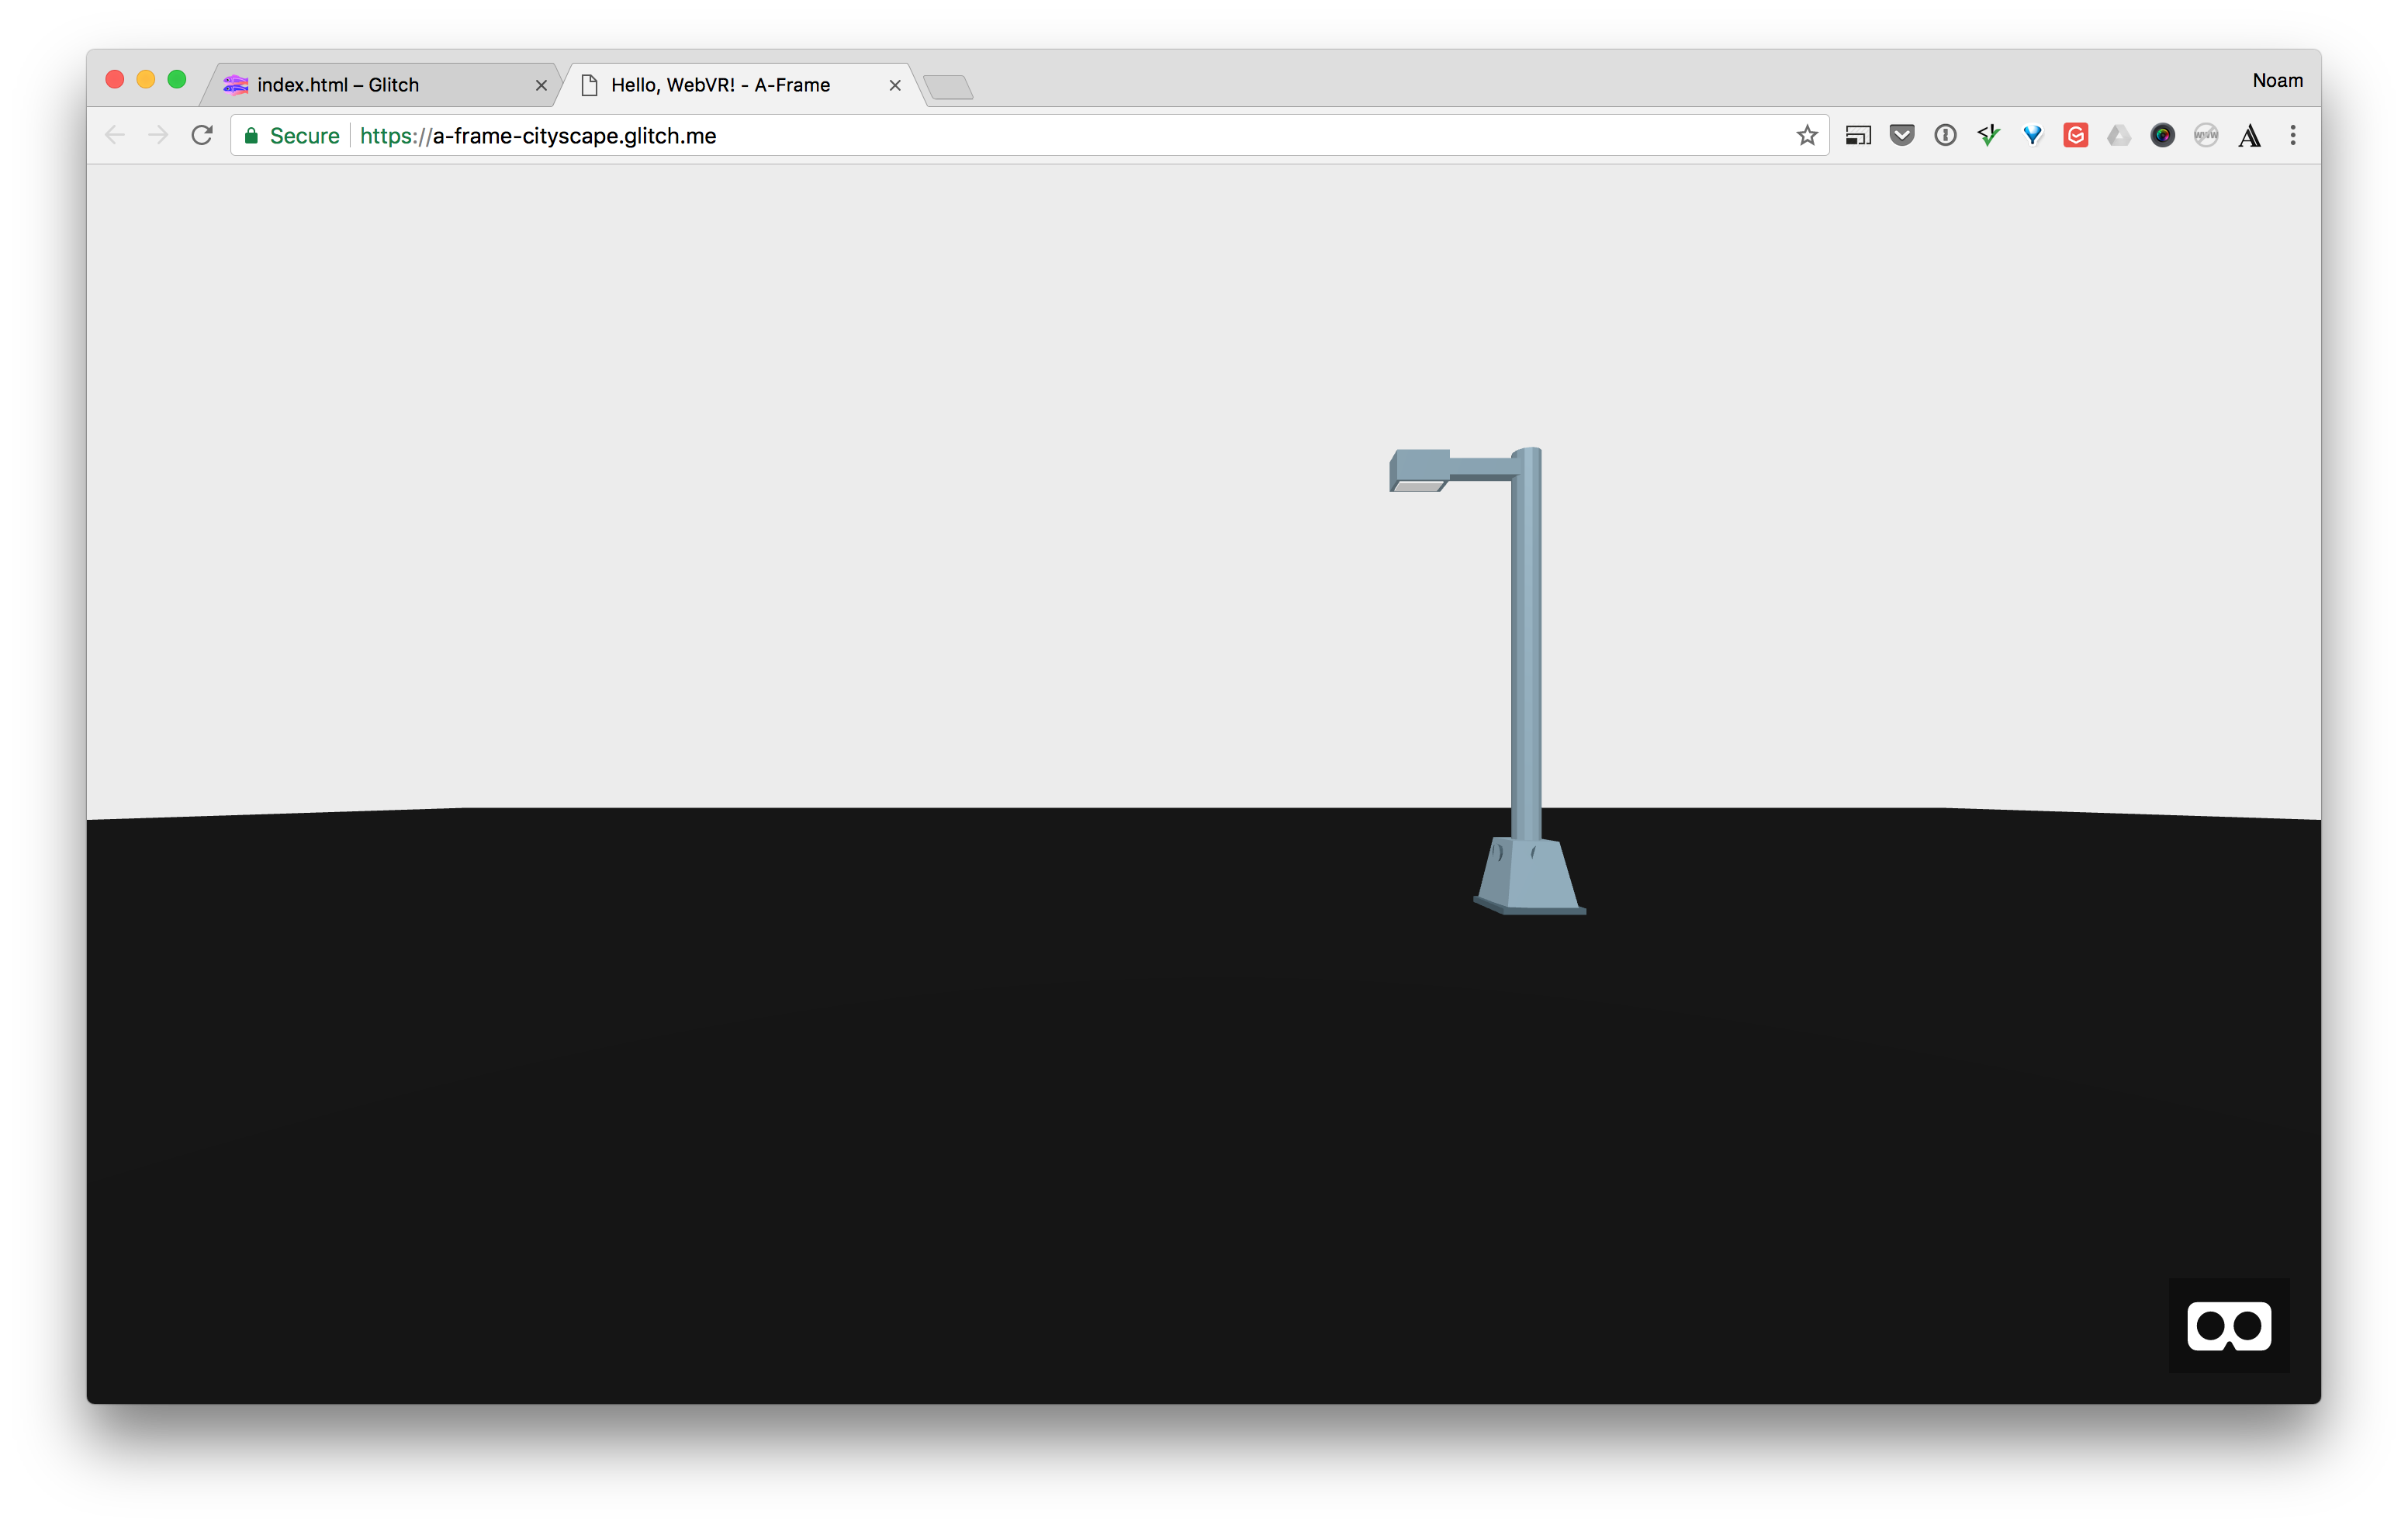
That’s a bit better, but it would be nicer if the light faced us instead of away from us. To fix that you’ll add the rotation attribute, and rotate the model 180 degrees around the y axis.
Add the rotation attribute like this:
<a-obj-model position="2 2 -5" rotation="0 180 0" src="#street-lamp-obj" mtl="#street-lamp-mtl"></a-obj-model>
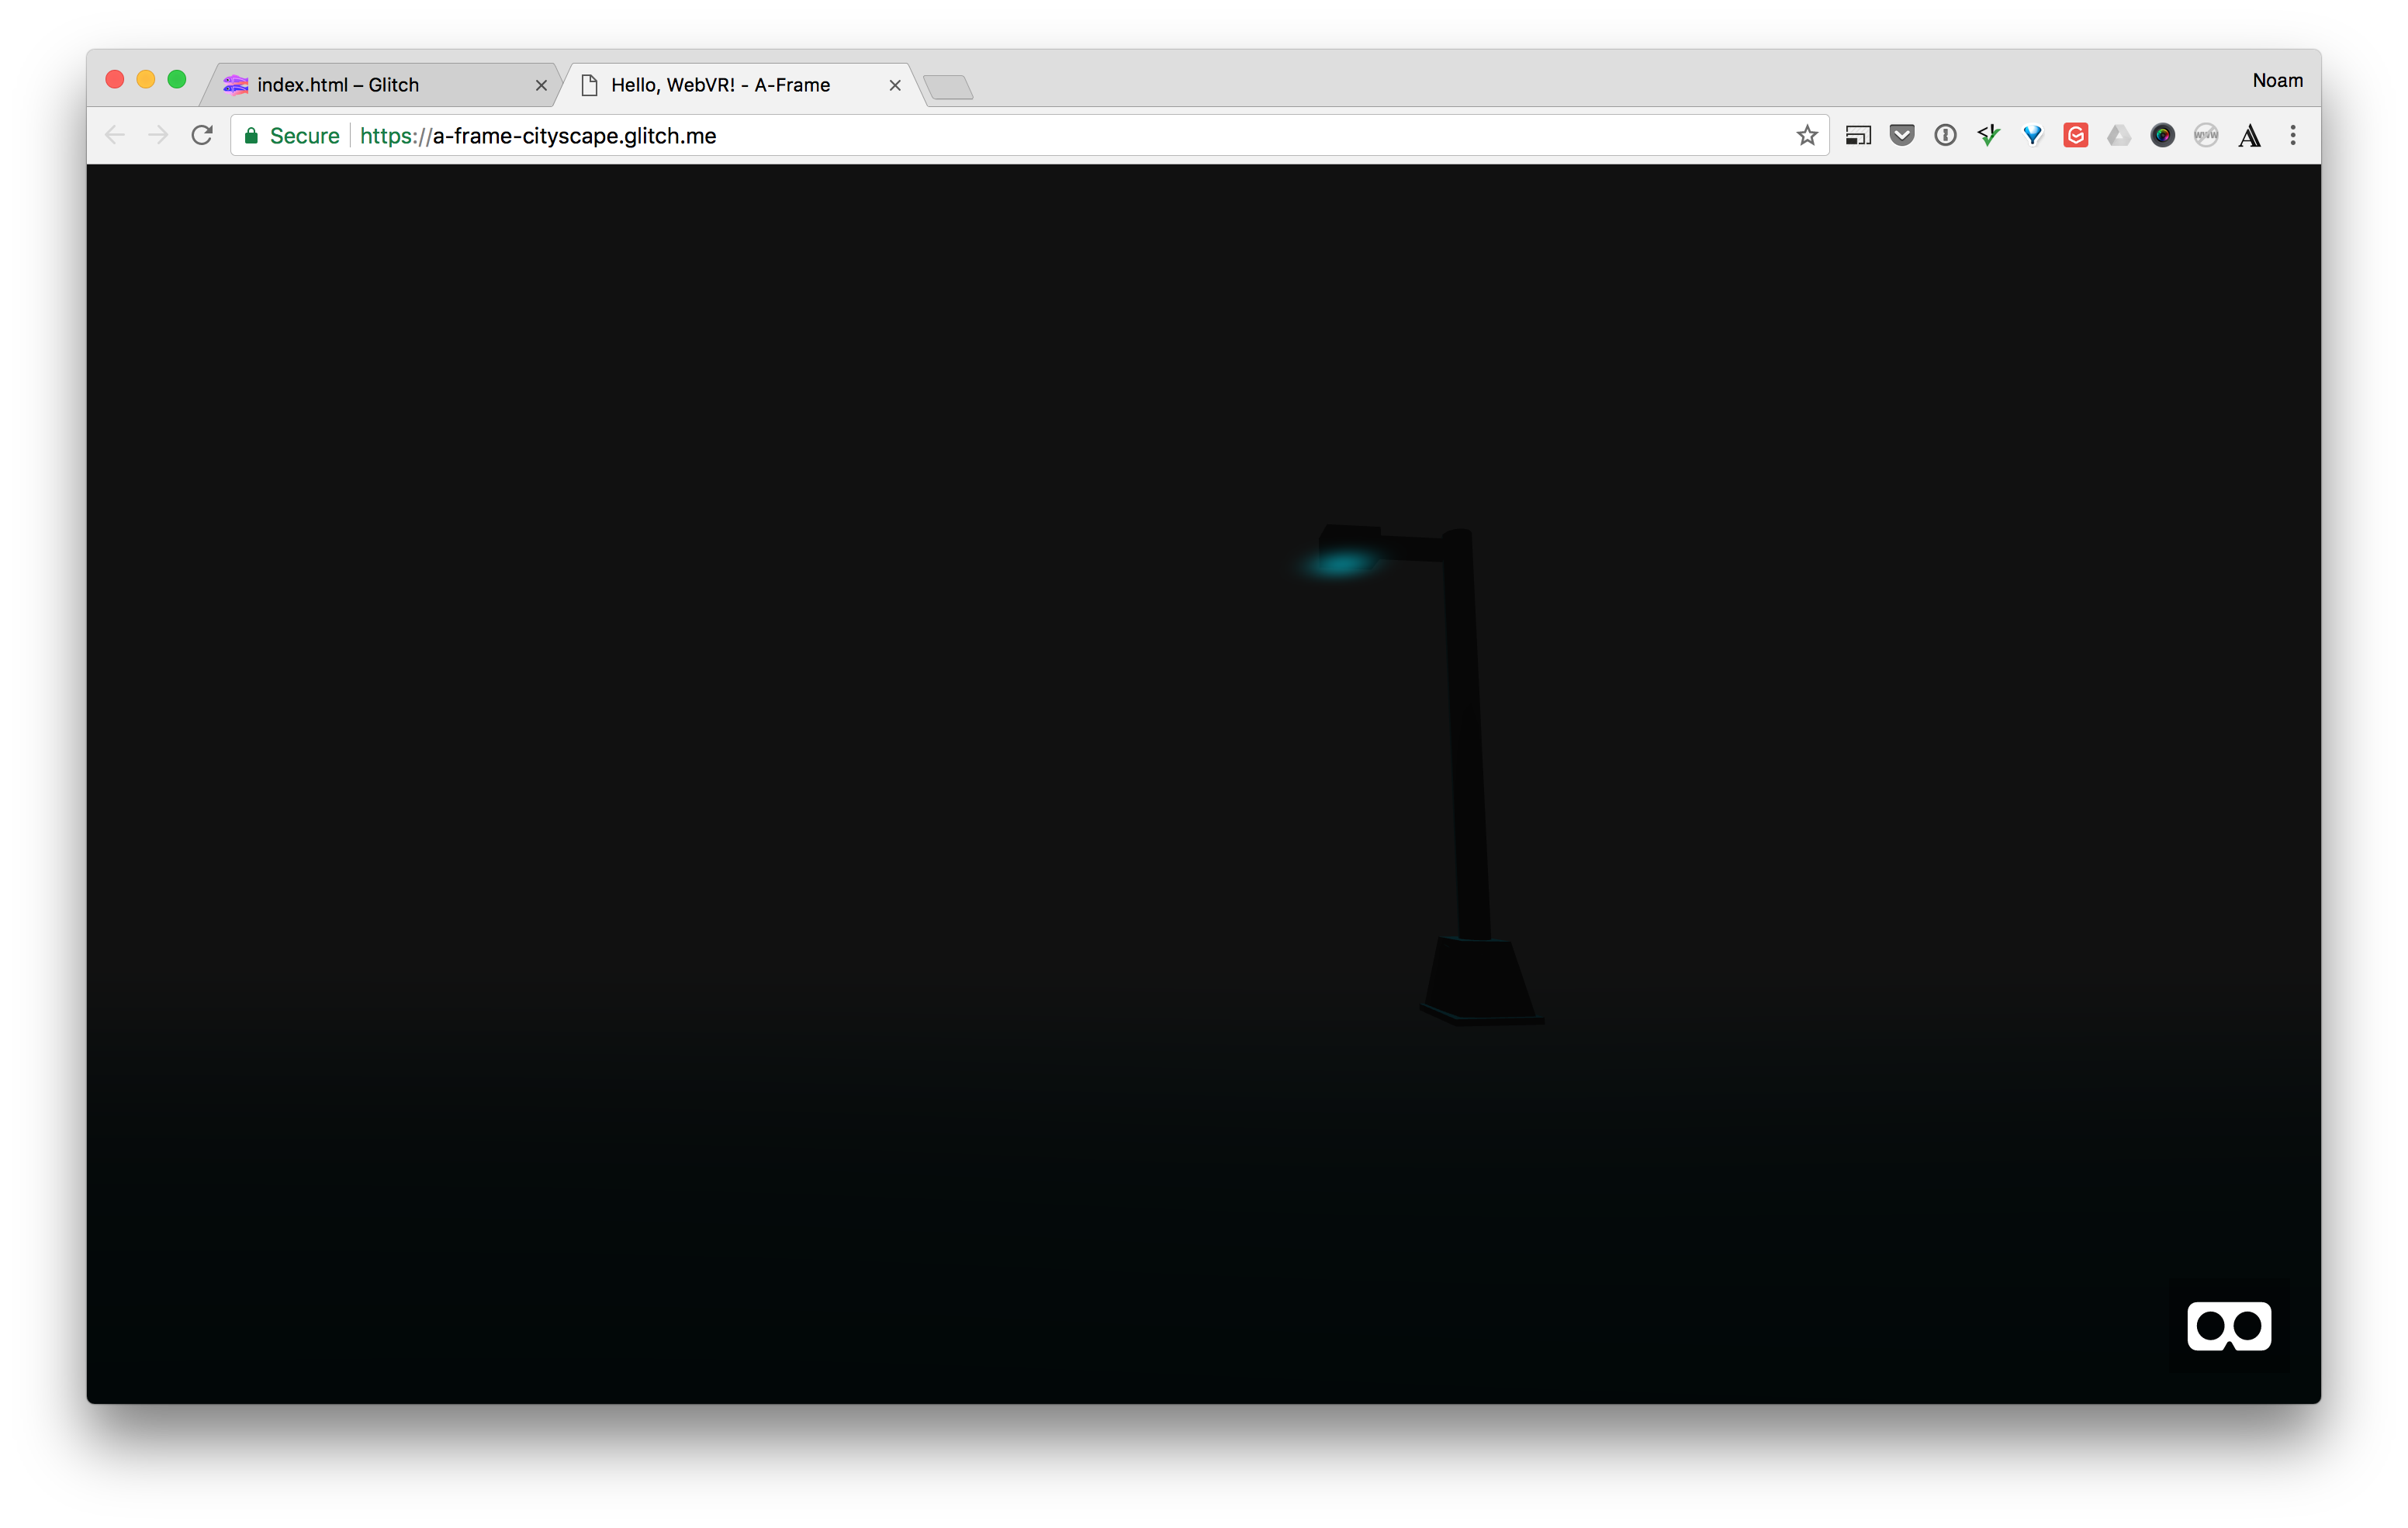
Now if you click the Show Live button, it’s a little bit closer to the goal.
Add Lights and Set the Mood
First you’ll add the blur image next to the street lamp, to make it look like it’s turned on. Then you’ll add an actual A-Frame light. Finally you’ll set the fog to create the mood of mystery we talked about at the beginning of this article.
To add the blurred image you’ll add the <a-image> tag after the <a-obj-model> tag. You’ll also want to position it next to the top of the street lamp.
<a-image position="1.4 3.6 -5" src="#blur-image"></a-image>
Your scene should now look like this.

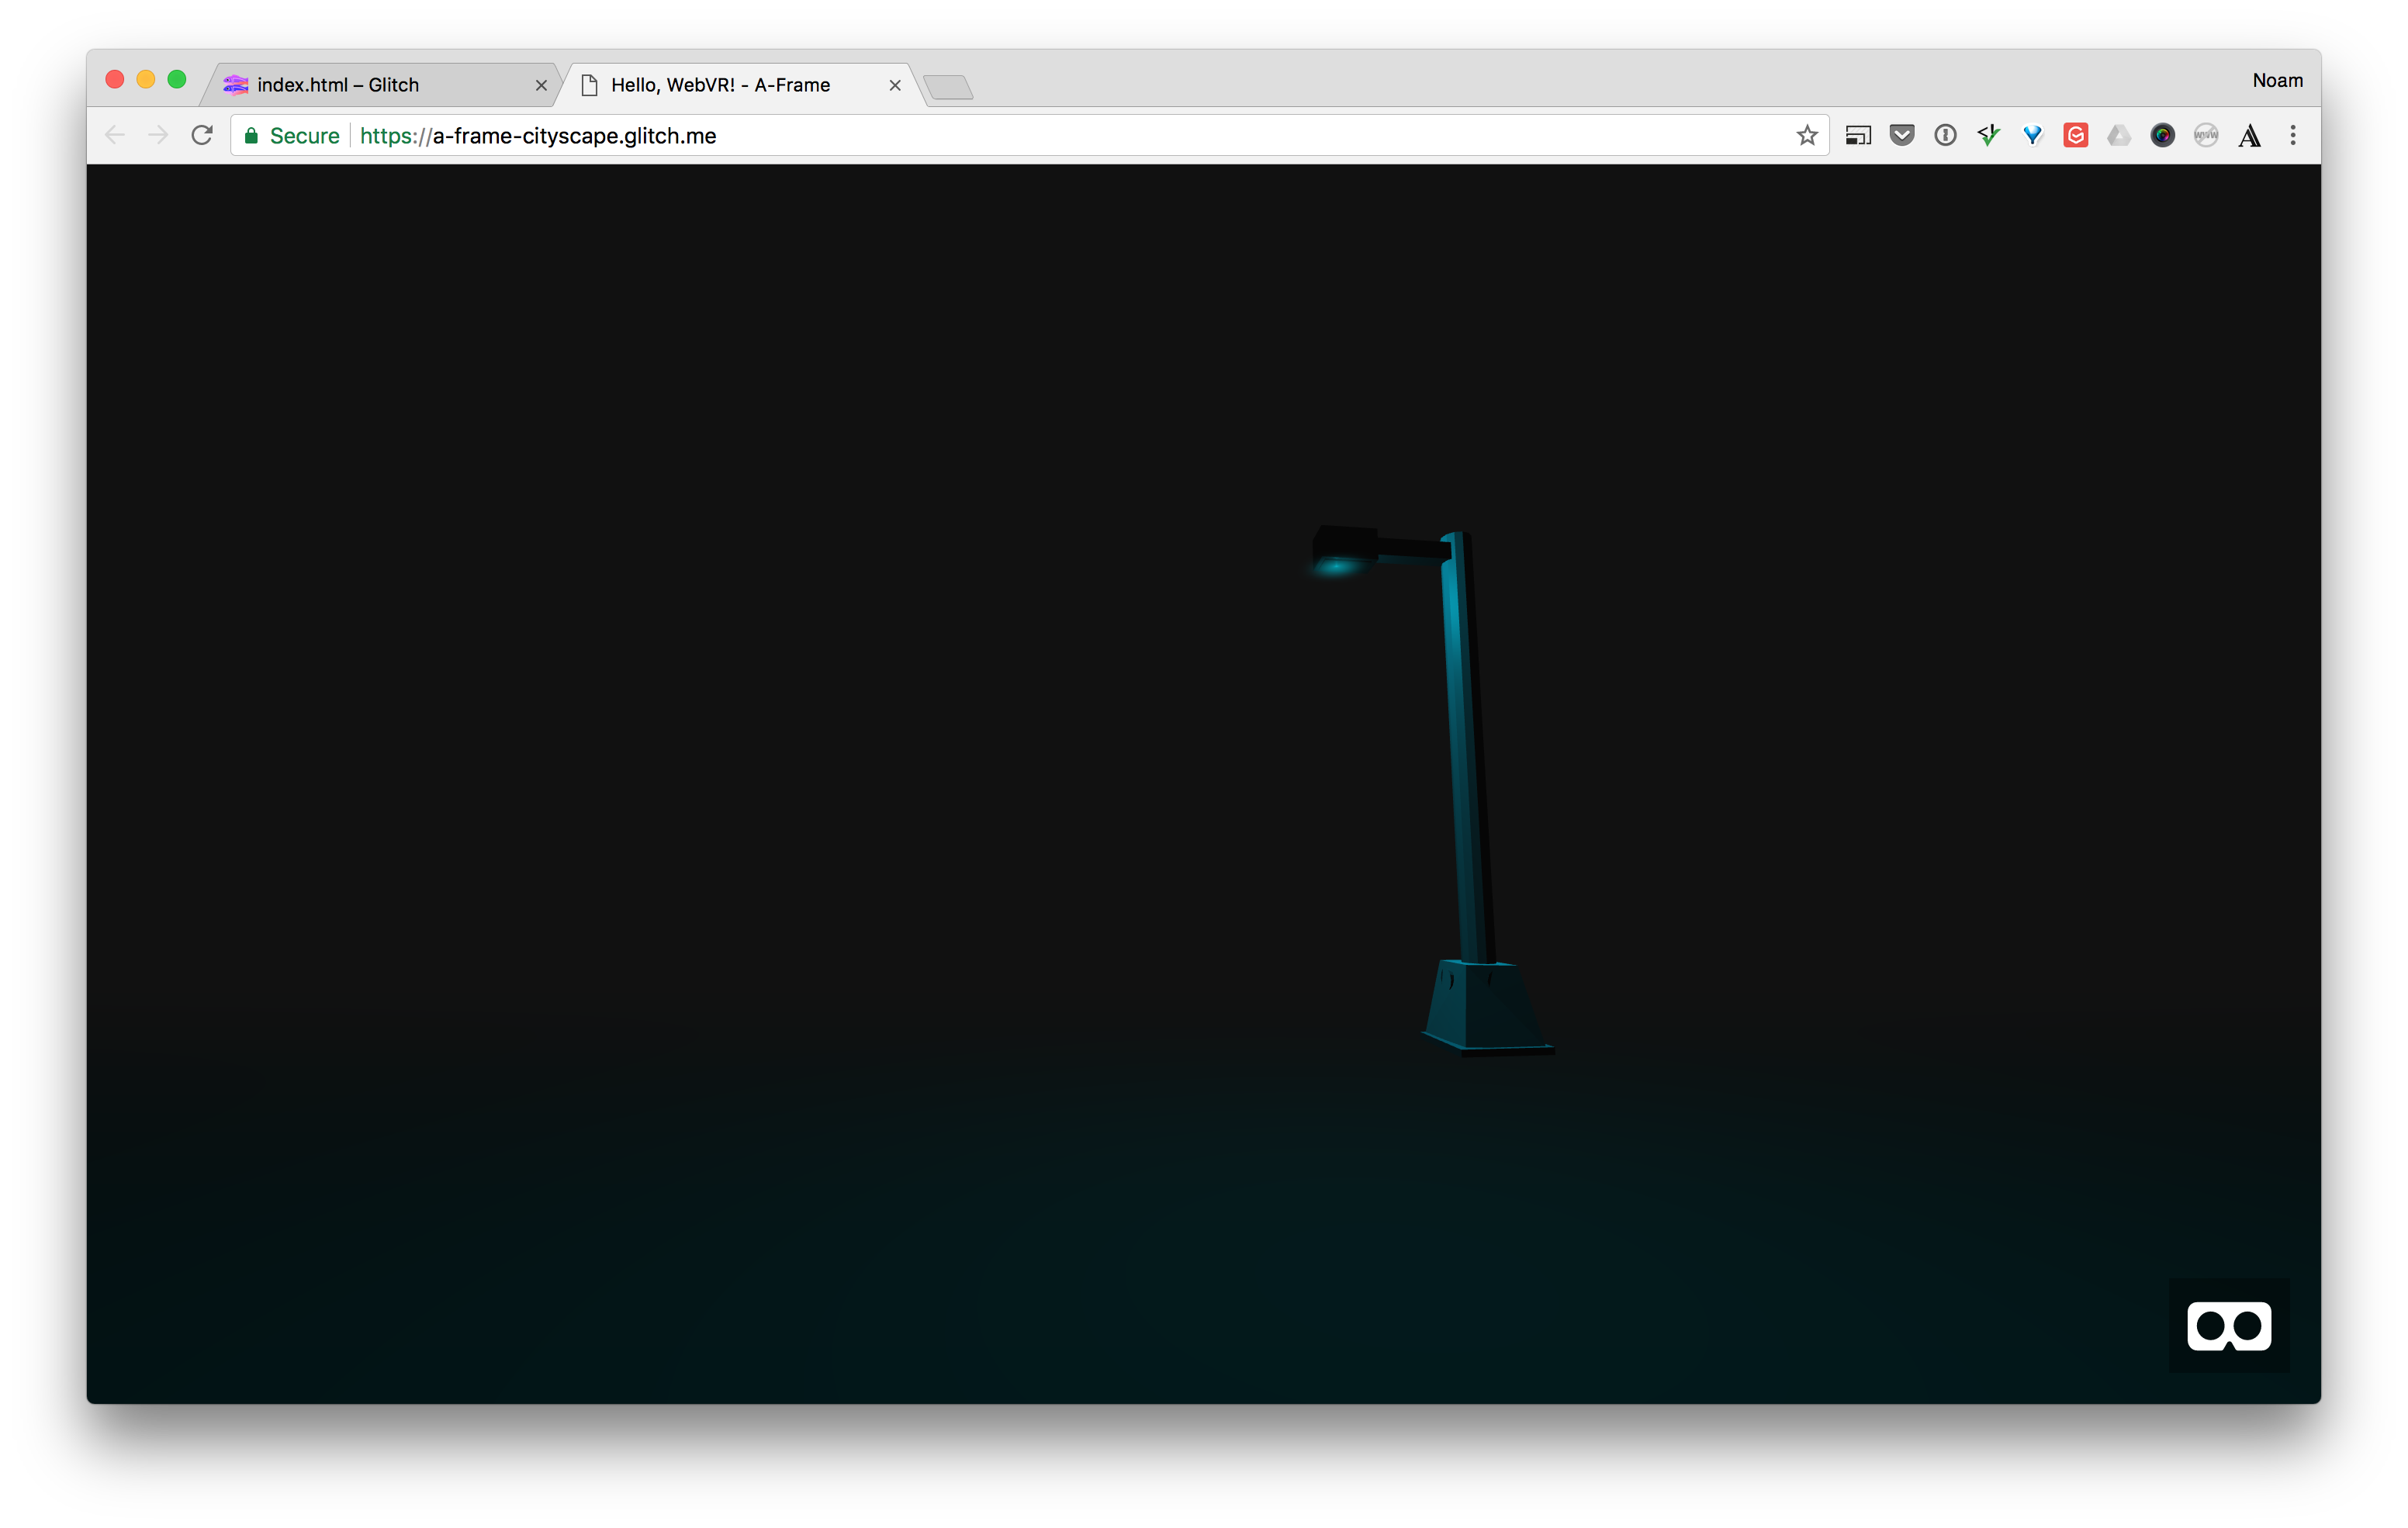
It’s getting closer, but there’s a small problem. If you walk forward (using the W key) and look at the light, notice that the blur image is flat. It looks quiet odd at this angle. Check out the next screenshot to see the problem.
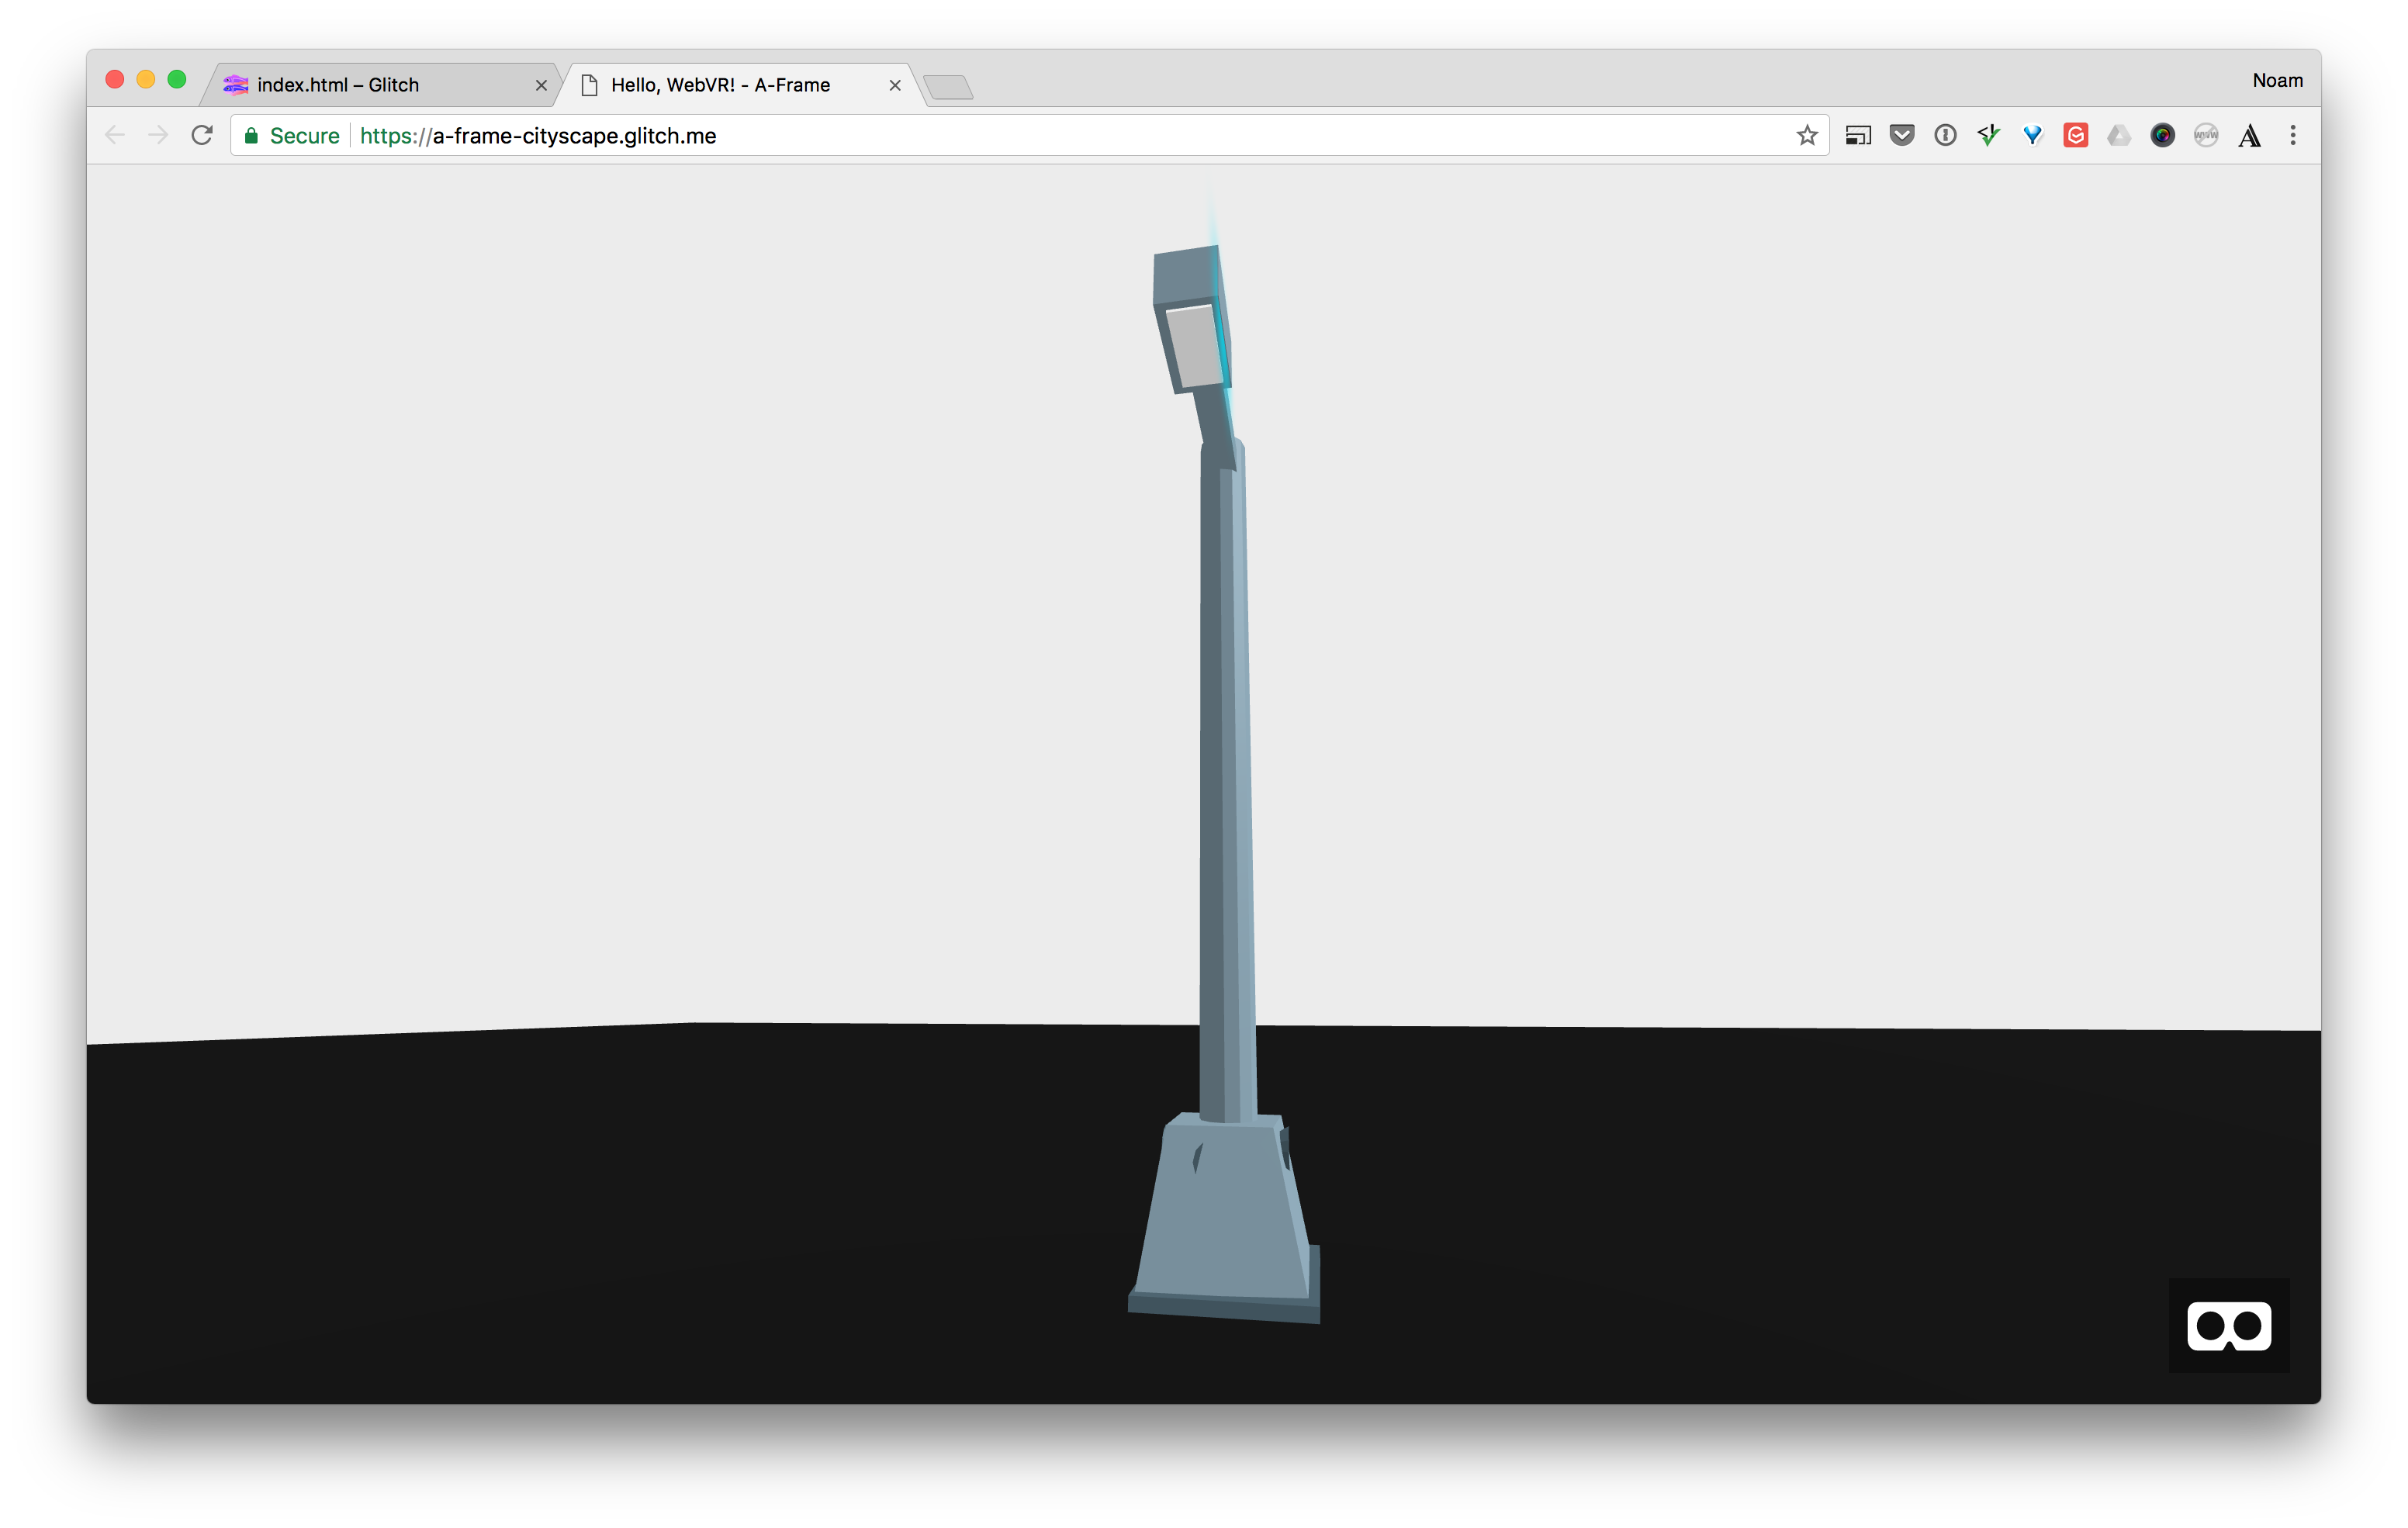
Let’s make it look a bit more natural by rotating the blur to be flat just like we did for the ground, so that it’s parallel to the street lamp’s bulb.
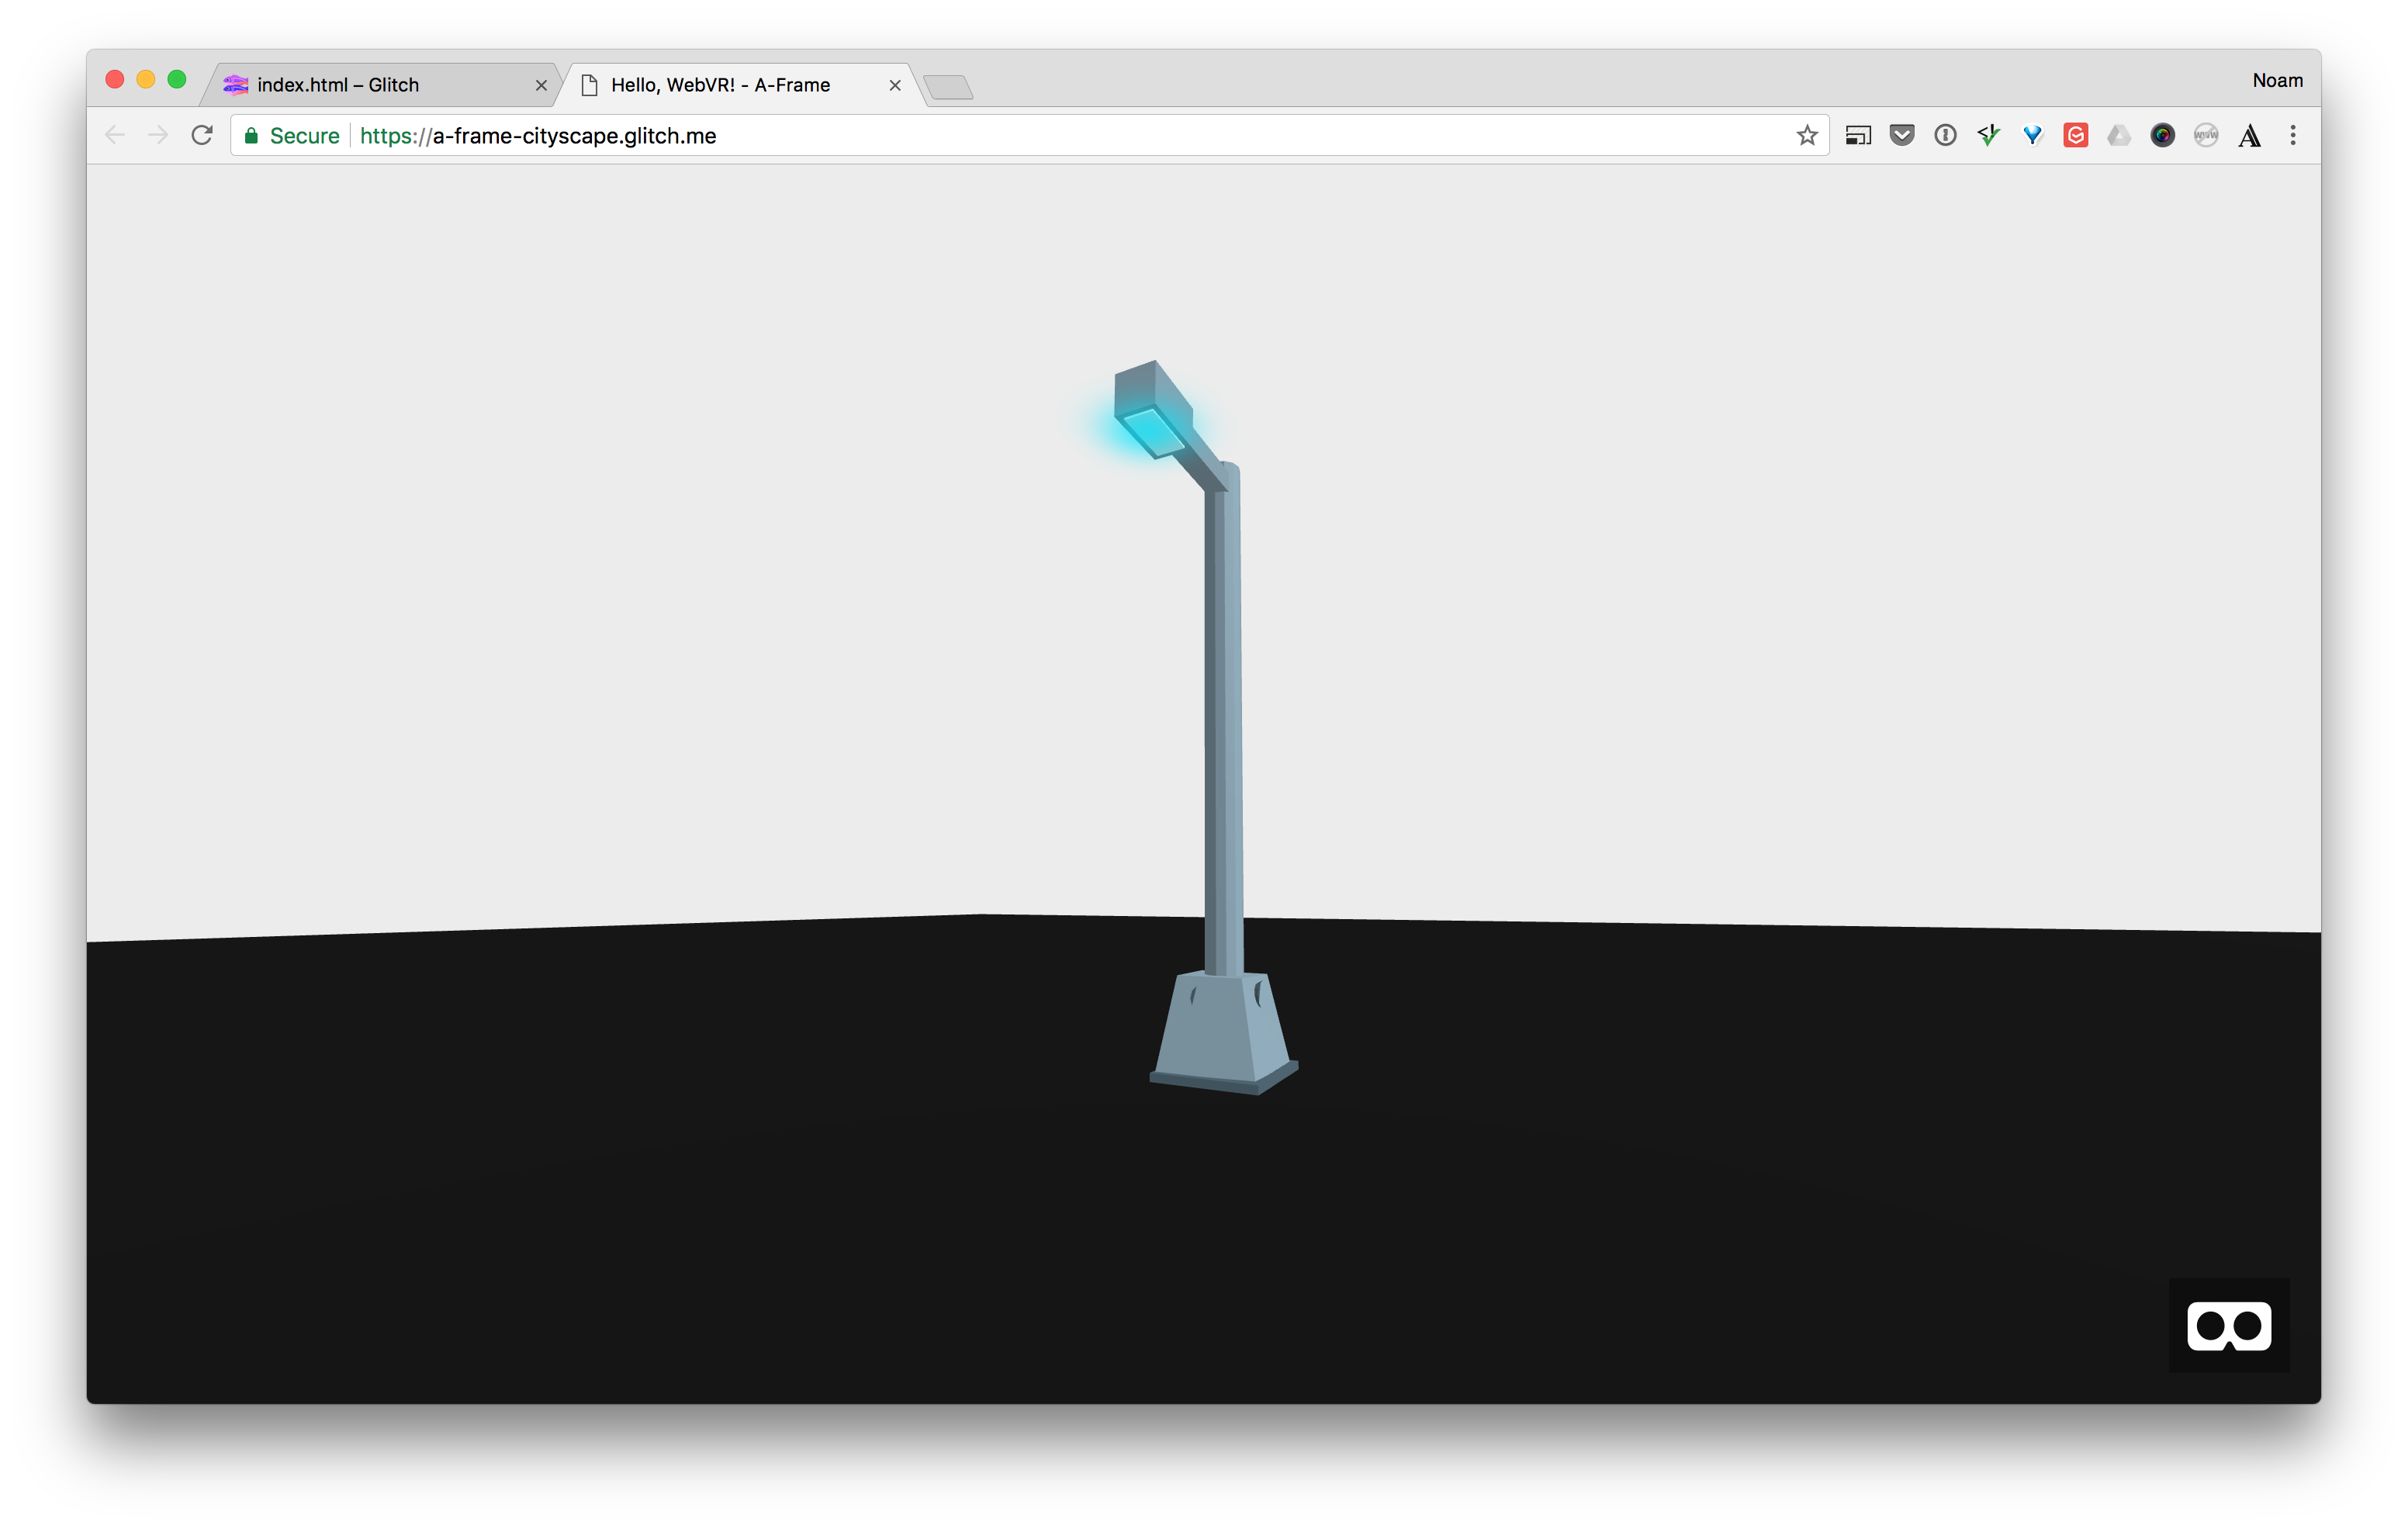
To do so, add the rotation attribute and rotate the entity around the x axis -90 degrees.
<a-image position="1.4 3.6 -5" rotation="-90 0 0" src="#blur-image"></a-image>
Now if you look at it, it should be a bit more natural.
Add the Light and Fog
You have all of your objects in place, now let’s set the actual mood. First you’ll add the light entity. Then the fog attribute to the scene.
To add the light, you’ll use another primitive, <a-light>. You’ll add this tag right after your blur image.
<a-light position="1.4 3.6 -5" type="directional" intensity="1" color="#00E6FF"></a-light>
Notice I’ve set the color to match the same one as the blur image. I’ve also positioned it at the same location as the blur image.
If you click the Show Live button now, you’ll see the beginning of the mood. Notice how the street lamp is slightly illuminated from the light.
Let’s take it one step further. You’ll add some fog to your scene tag. There are two kinds of fog in A-Frame, linear and exponential. For this article I’ve decided to use the exponential one out of experimentation.
Here’s how to add the fog attribute to the scene tag:
<a-scene fog="type: exponential; density: 0.15; color: #111;">
Notice that the fog attribute takes a few more properties than the primitives we’ve worked with so far. It’s similar to how you write inline CSS in HTML tags.
If you click the show live button now, its should be closer to what we want.
The scene is a bit too dark though, so let’s play with the properties to see if we can make it a bit better.
First the blur image is a bit too big. Let’s scale it down just a bit using the scale attribute.
<a-image position="1.4 3.6 -5" rotation="-90 0 0" scale="0.8 0.8 0.8" src="#blur-image"></a-image>
Next, you’ll tweak the light’s properties to make it a bit better. The first thing you’ll do is change the light type to be a point light instead of a directional light. A directional light is one that’s infinitely far away, like the sun. A point light on the other hand, is like a light bulb.
Also change the intensity to 1.5 instead of 0.5.
<a-light position="1.4 3.6 -5" type="point" intensity="1.5" color="#00E6FF"></a-light>
Click the Show Live button to see the improvement.
That’s better, the lighting is now more engaging, and illuminates the street lamp in a more natural way.
Let’s do one more thing to give the scene a bit more mood. you’ll use an ambient light to make the dark grays a bit less harsh.
You’ll add an ambient light right after the point light:
<a-light type="ambient" intensity=".3" color="#00E6FF"></a-light>
If you look at the scene now, you should notice a subtle difference in the mood. It should be more engaging, the street lamp model is slightly brighter than it was before.

Let’s tweak one more detail. The fog is a neutral dark gray. You’ll change it slightly, to be more green blue like the rest of the scene. It will make the scene more harmonious in regards to the colors.
In sketch you’ll get a darker value by looking at the color pop-up. Start with the blur image color and then drag the color brightness down.
As a result you get a value of #10454A instead of #111 which didn’t have the hue to make it harmonious.
Set your fog color to this new darker hue:
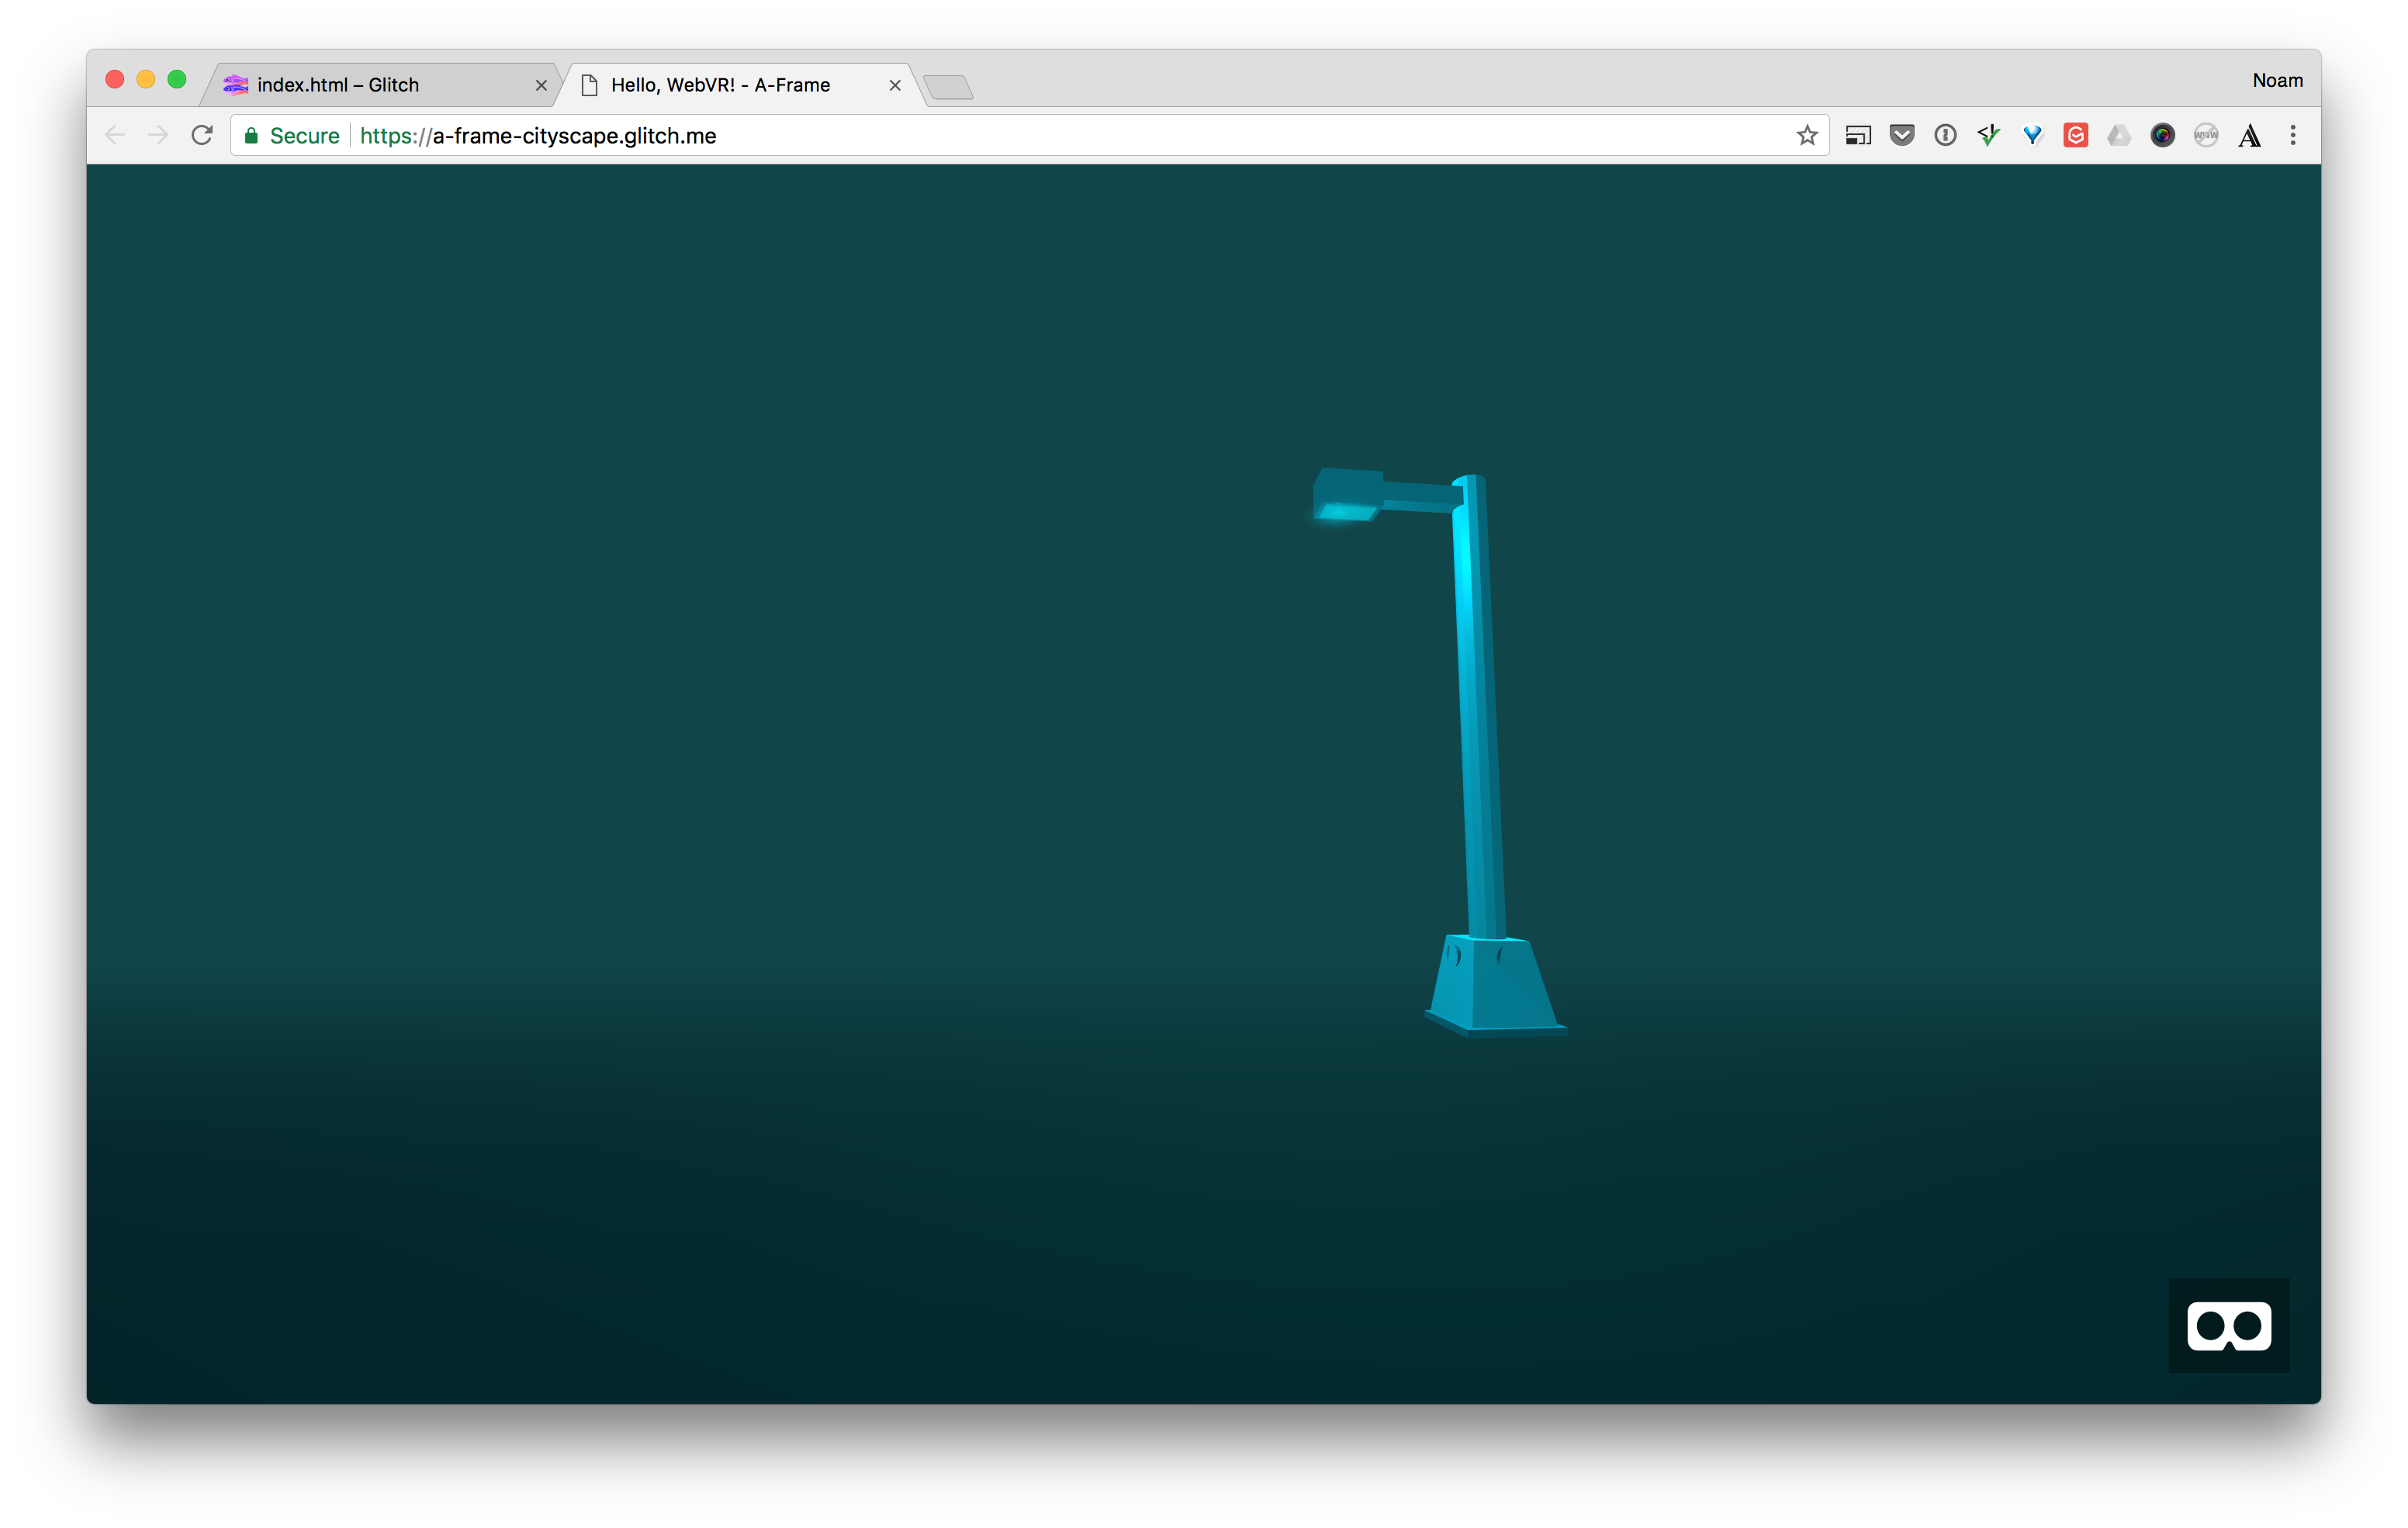
<a-scene fog="type: exponential; density: 0.15; color: #10454A;">
Now click the Show Live button and tada! You’ve set the mood! It’s now much closer to the original inspiration from Carl Burton!
Hopefully this article gets you interested to experiment with WebVR design, lighting, as well as with A-Frame! I’ll be posting a second part to this article next week, where you’ll animate the properties of the scene to make it come to life!
Special thanks to Alfredo for helping me troubleshoot as I wrote the article.