In this post I’ll show you how to quickly get up an running with AR design Preview 1 in Ottifox.
Getting started
First make sure you are running Ottifox 2.1. Available for download by signing up here.
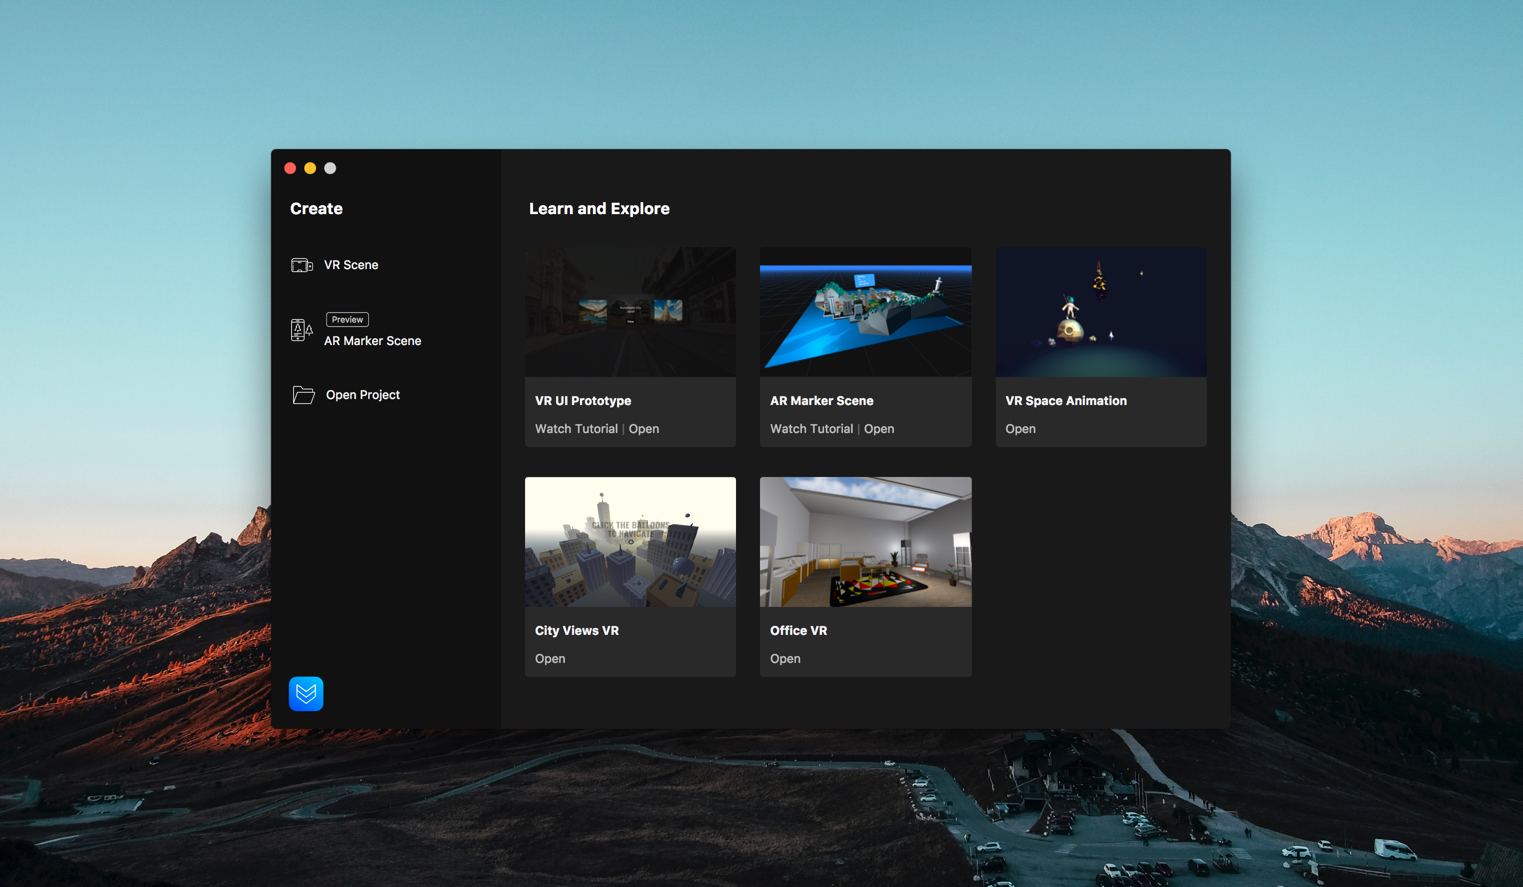
When you launch Ottifox 2.1 you’l see the new option to create a marker based AR scene. Go ahead and click that option to get started.
Marker based AR
AR currently has two approaches - marker based and marker-less. Marker based AR is what’s available in today’s build of Ottifox - where the camera relies on a marker being present to help it with the placement and orientation of the scene. Marker-less AR is the newer more cutting edge approach - where image recognition is used to determine placement and orientation. As the technologies progress we plan to offer marker-less support as well.
Designing the scene
Designing the scene in an AR project is very similar to designing a VR scene, but with a few pieces taken out to accommodate the AR context. The first is the lack of a sky element, because your AR scene will use the camera feed as the background.
The second thing to note is that the camera is replaced by the phone’s camera when the user runs the scene in AR. That means that in Ottifox, moving the camera around in an AR project won’t do much. We left it there for the convenience of having a starting point and a point of reference to get back to as you design.
Also, click actions on objects do not currently work in this build. Since it’s the first version we wanted to keep it bare bones, and be opne for feedback before adding more functionality. Normal actions, like animations on scene start do work in this build.
Populate your scene
You can go ahead and quickly populate your scene by clicking the Google Poly button and adding a 3D model.
Test it in AR
With a simple scene built, you’re ready to test it in AR. First make sure your phone is on the same wifi network as your computer. Then click the preview button at the top right of the app.
Click the Start Preview button, and you’ll see your marker appear in the preview pop up.
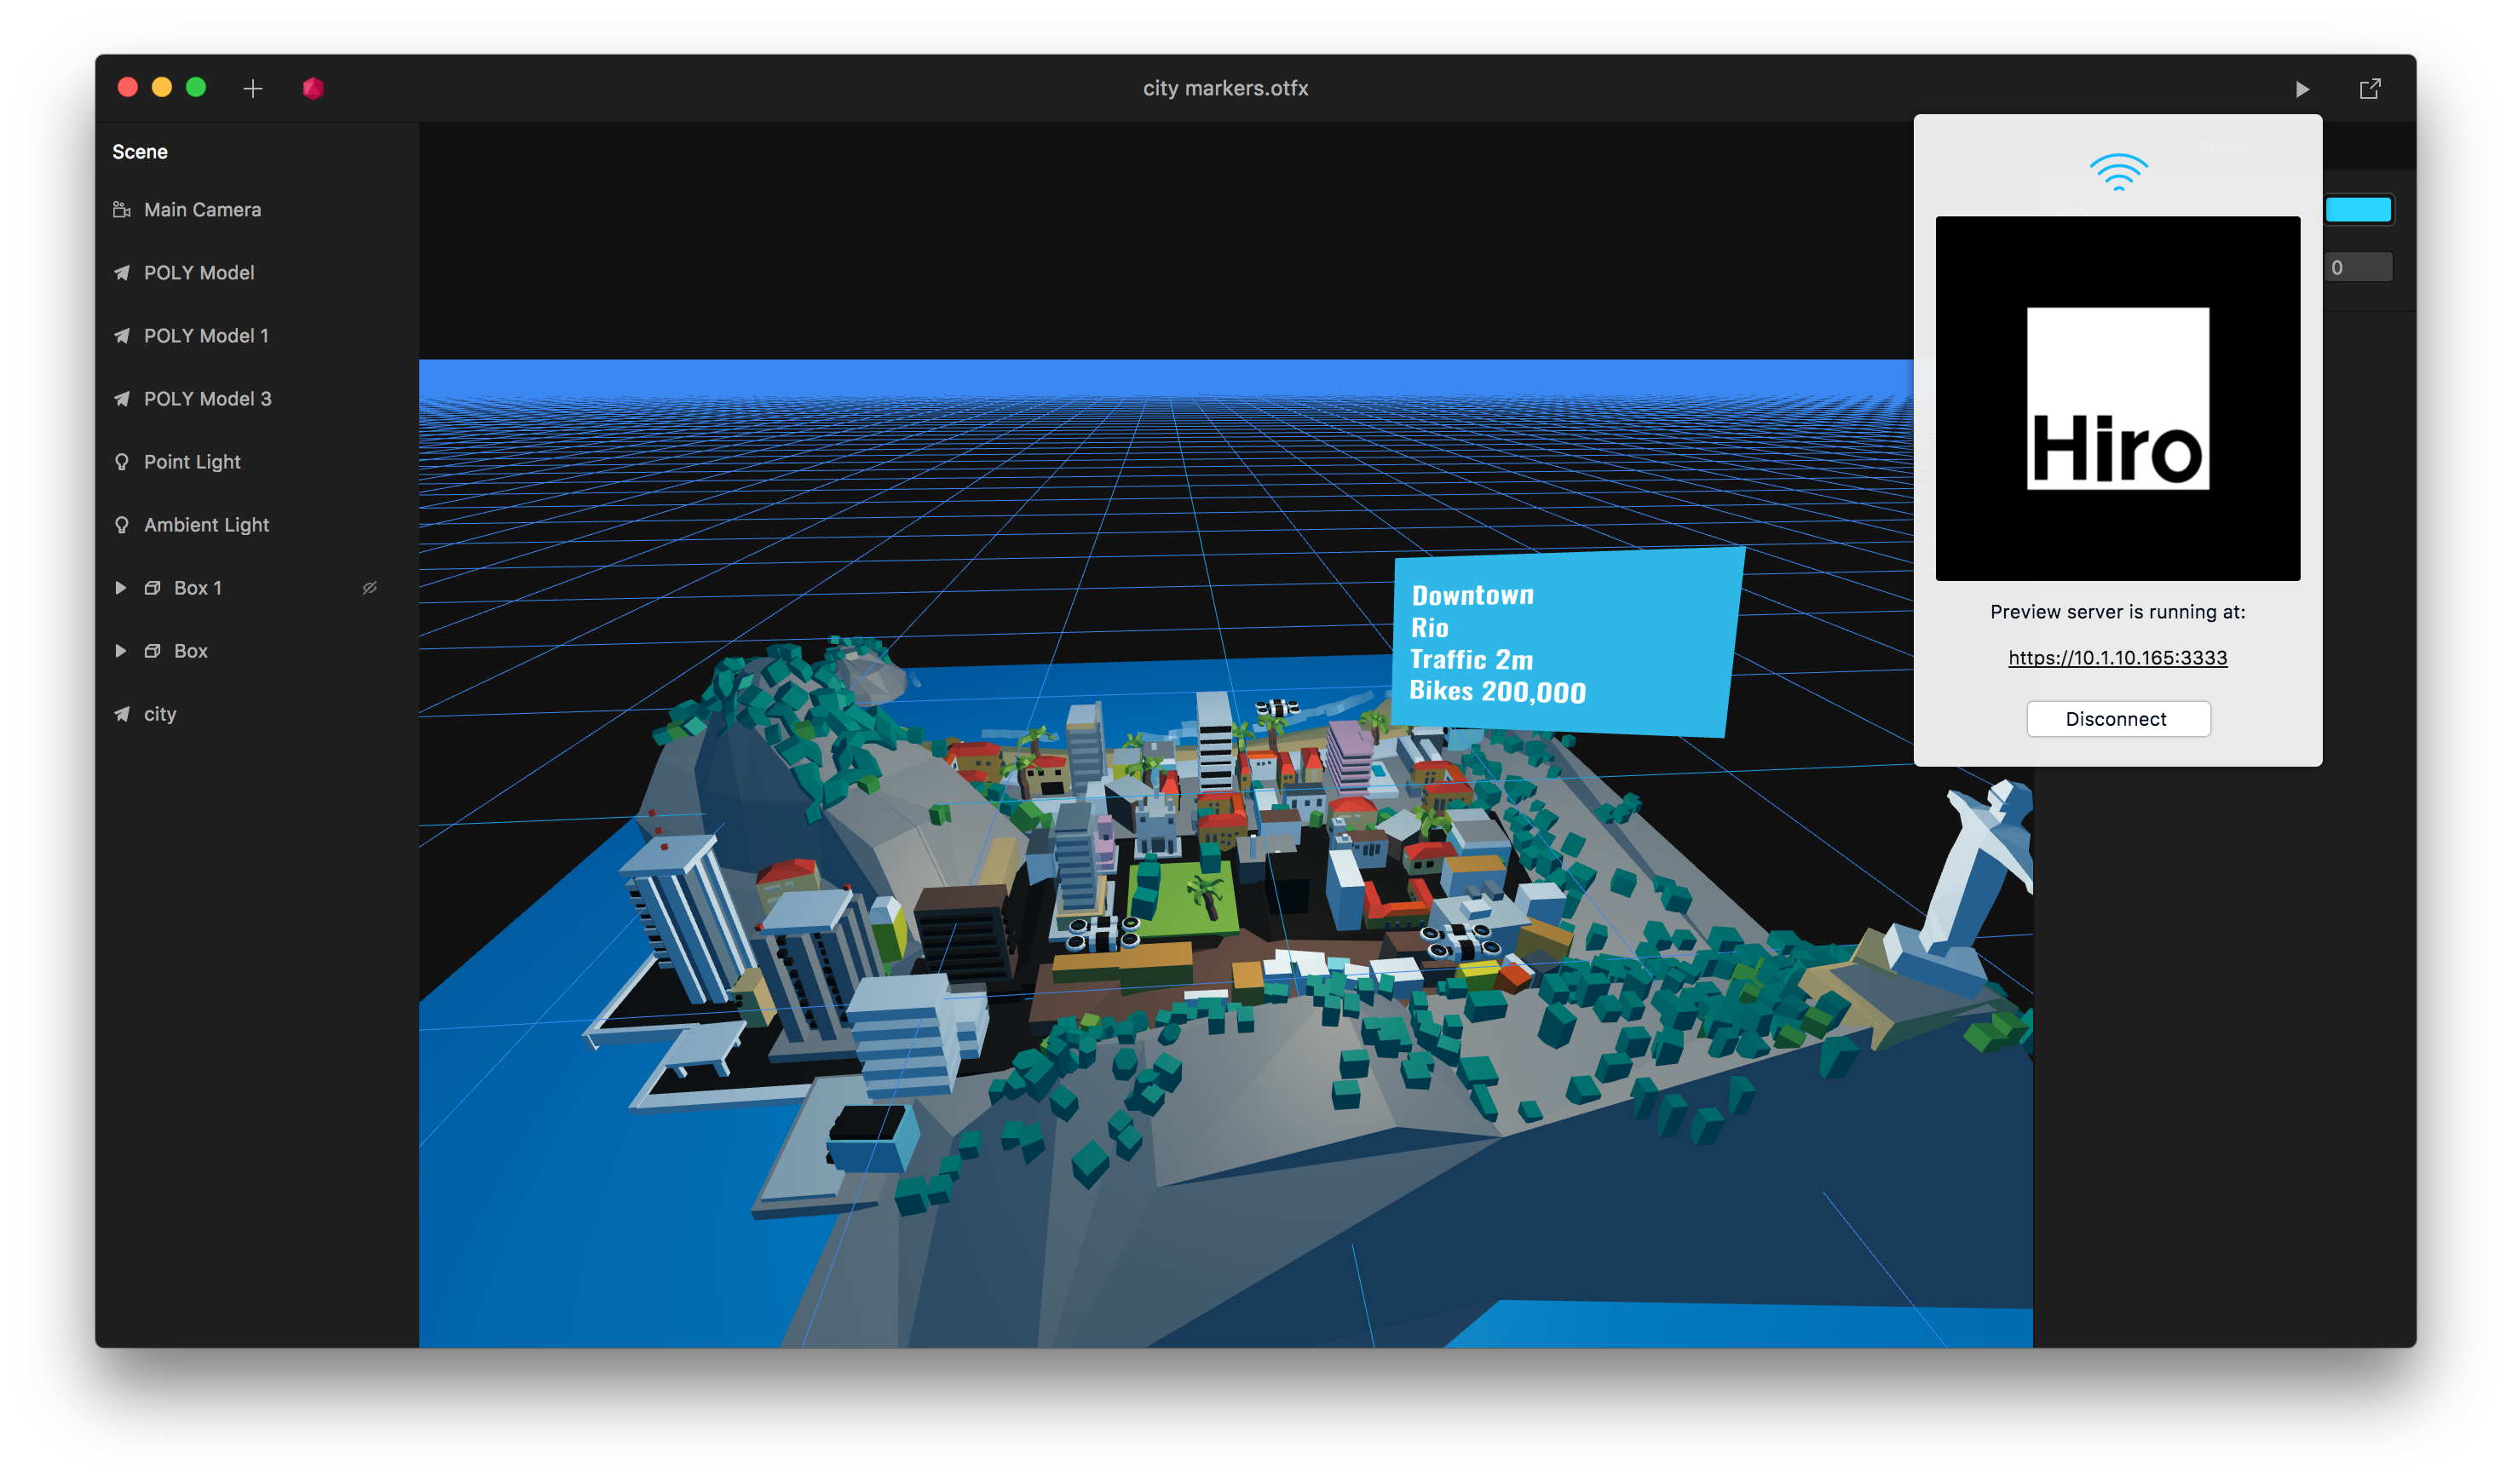
In your phone’s browser, open the URL that’s placed under the marker. Notice that it starts with https.
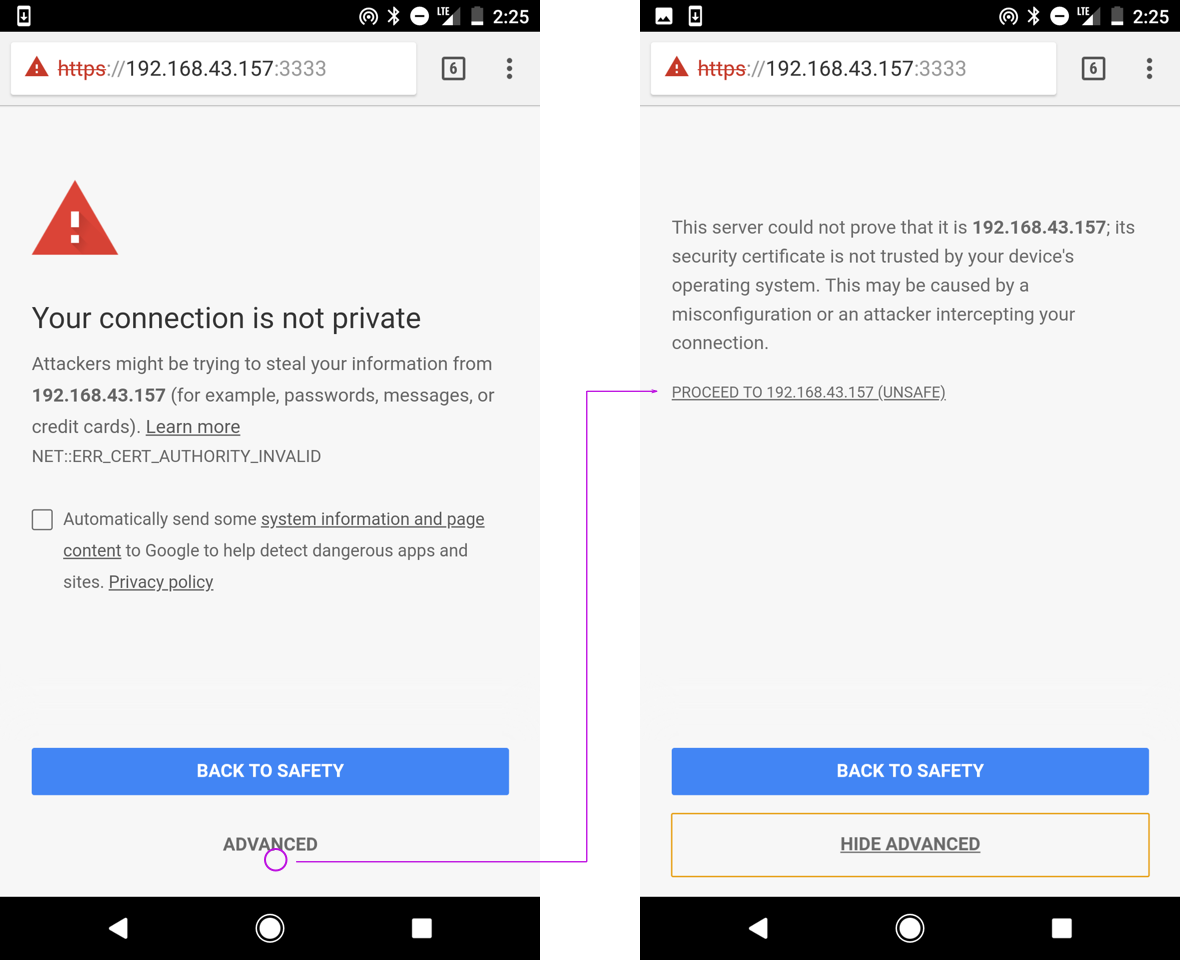
When you’re phone loads the scene you’ll see a security message appear. The reason this message pops up is because camera support requires an https connection in order to work. Ottifox creates a temporary security certificate when it previews files localy and the browser doesn’t know if the certificate is valid so it gives you this message.
If you export your scene and upload it to a server with https support, this message won’t appear.
To get to scene to work locally on your phone, and to get past the security message click the advanced button, and then click the ‘proceed’ link.
On Safari, you’ll recieve a similar message, click the Show Details link, then click the visit this website link to proceed.
Allow camera permissions
Next you’ll see a dialog asking you to allow the camera to work. Tap allow and the scene will load.
Now you can click the start button to get into AR.
Orientation
AR on the phone’s browser currently works best in Landscape mode, so go ahead and re-orient your phone. Then point it at the marker and you should see the first glimpse of your scene.
You might have noticed that you’re looking down at the scene and not sideways like it appears in Ottifox. That’s because traditionally the marker is placed on a flat surface like a table, and not on a sideways surface like your computer’s screen. To fix that problem we added an alignment button at the top right of your phone’s screen. Tap it and it will re-orient your scene to work with the sideways marker.
Most marker based experiences will be on a flat surface and not sideways so we’ve defaulted to that setting. In the future we’ll let you choose which default orientation you prefer at export time. For example if you plan to have a sticker that works as a marker, then you might prefer sideways orientation as the default.
Experiencing in AR
As long as you point your camera at the marker, you can move around and see your scene from different angles. You can also print out a marker here and experience the AR scene with friends and colleagues on a flat surface.
If you click the rotate button under the alignment one, it will also rotate your scene.
And that’s all it takes to create an AR design and prototype. We want to hear from you on where to take it next, so let us know!